
The Standard Docusign integration connects your Docusign account to ContractSafe so that any time a contract reaches the fully executed stage in Docusign, it's pushed automatically into ContractSafe as a new contract. To set it up, you generate a webhook URL under Settings > Security & Integrations in ContractSafe, then add it, along with an HMAC key, to a custom Connect configuration in Docusign.
Requirements
To integrate Docusign with ContractSafe, you'll need Administrative access to both applications, or know someone who does!
You'll need a Professional plan on Docusign to set up this integration.
Lastly, if you need clarification, double-check with your Customer Success Manager if this feature is a part of your ContractSafe plan.
How the Standard integration works
The Standard Docusign integration connects your Docusign account to ContractSafe so that any time a contract reaches the fully executed stage with Docusign, the contract is pushed automatically into ContractSafe as a new contract. It's an easy way to keep every signed contract in ContractSafe, where the whole team tracks it! Sometimes, in large organizations, certain teams (we're looking at you, Sales!) aren't always great at sending in their signed contracts.
Configure ContractSafe
Enable Docusign in ContractSafe
- Log into your ContractSafe account.
- Select Settings, and then Security & Integrations.
- Enable DocuSign.
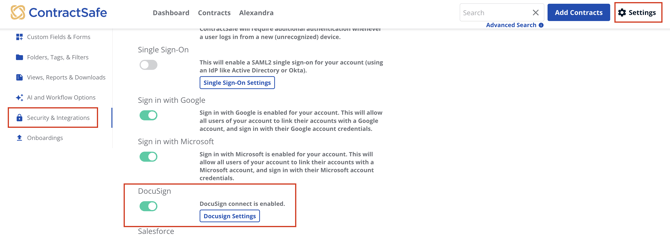
- Select Docusign Settings and click Generate in the pop-up window to generate a webhook URL.
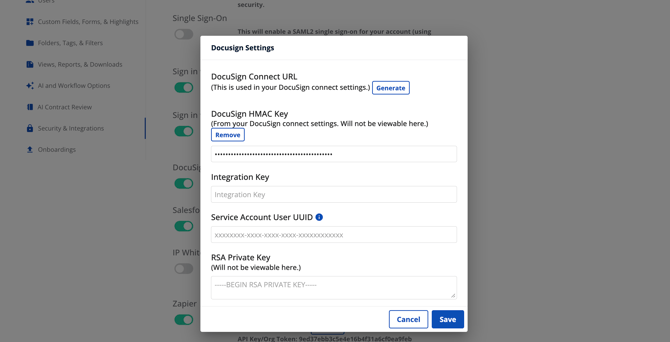
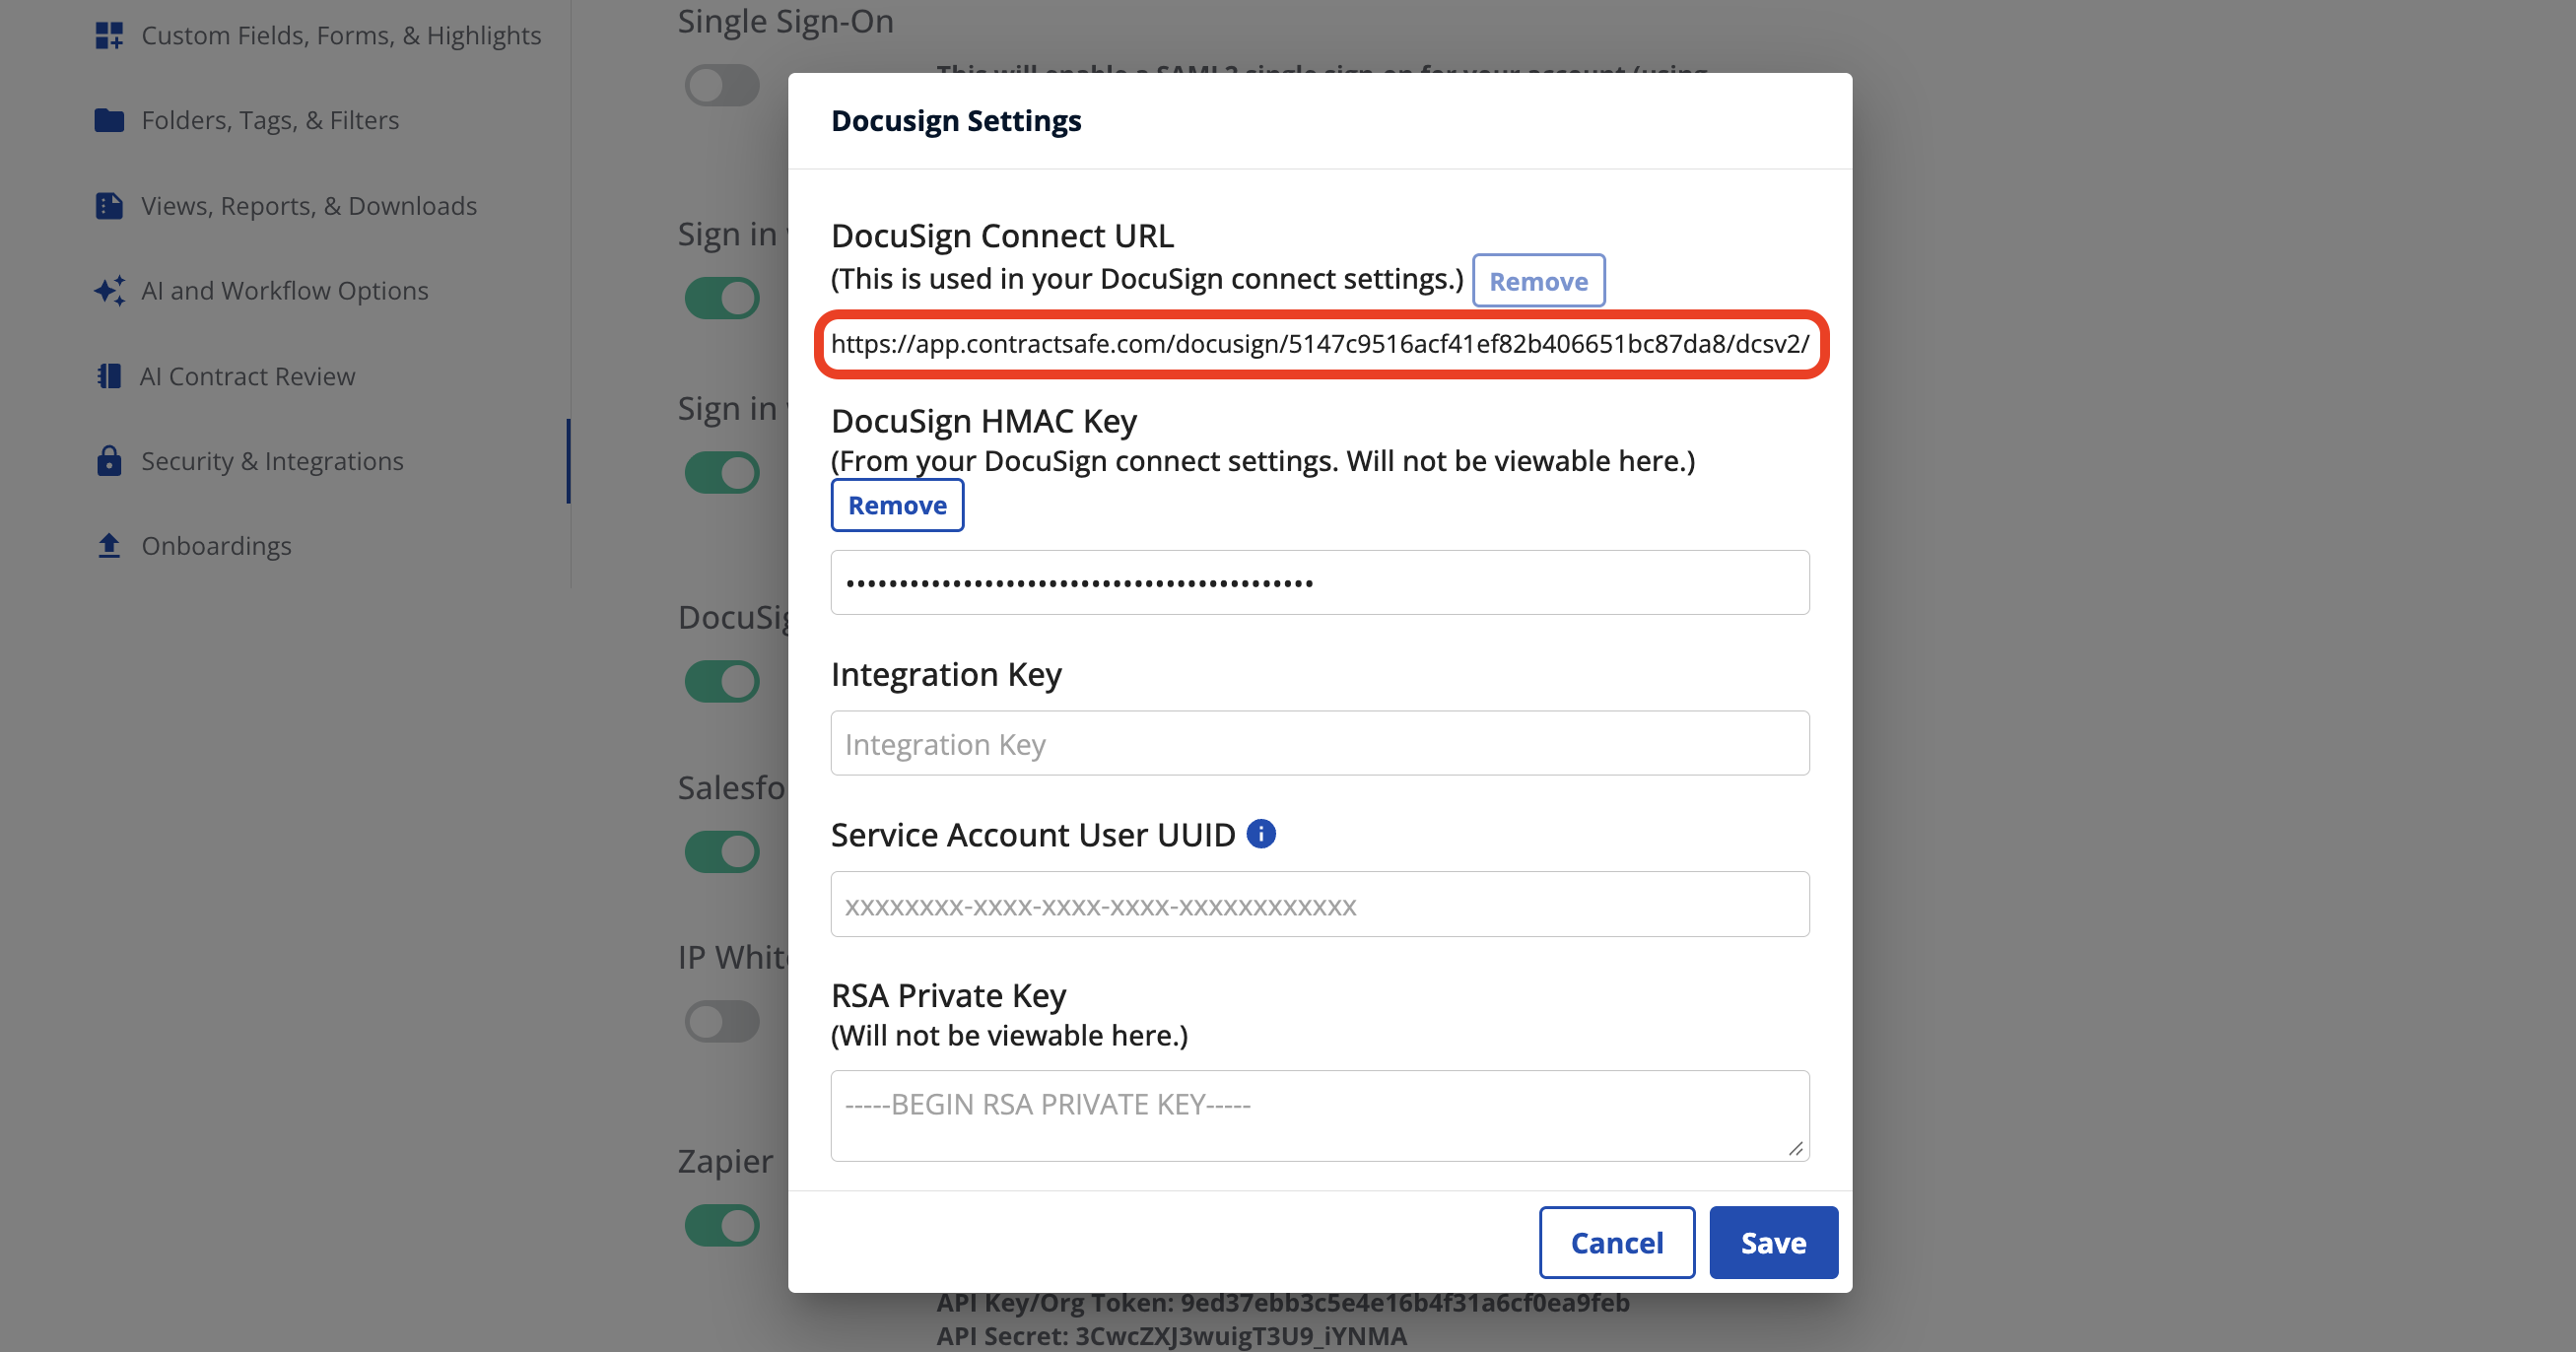
- Copy the URL for use in your Docusign app and click Save.
Configure Docusign
In your Docusign Admin account, select Settings.
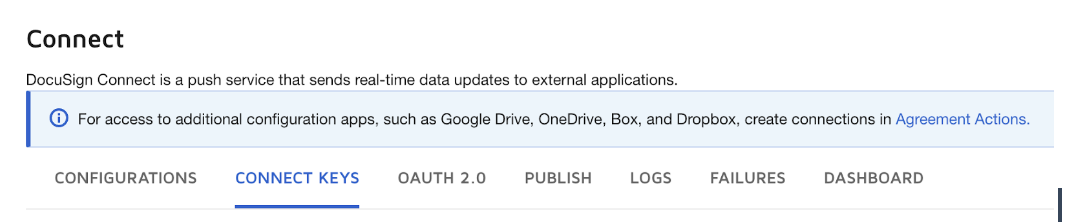
- Select the Connect page found under Integrations.
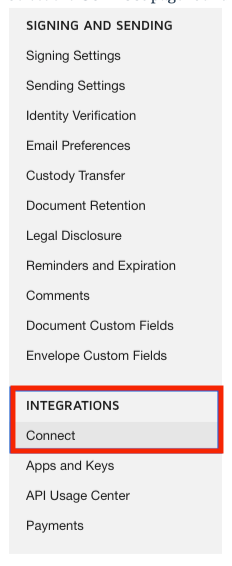
- Select Connect Keys and then click the Add Secret Key button.
Note: Copy the generated secret key and save it somewhere safe. This is the only time you'll be able to see it in either application.
Note: Sometimes, the Connect option isn't listed in Docusign, even though you have Admin rights. If you don't see it listed, you must call your Docusign rep and ask them to turn this on for you, because the Connect feature must be part of your plan.

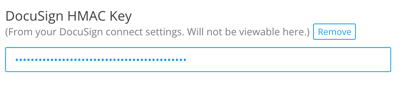
- Head back into ContractSafe, enter your generated HMAC key into the field labeled DocuSign HMAC Key, scroll down, and click Save.
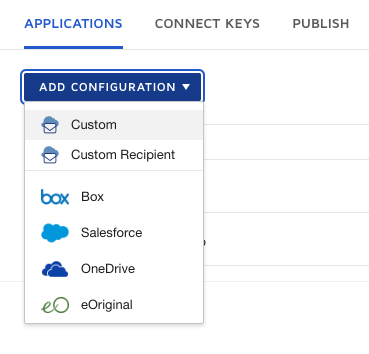
If you need to update your key, repeat steps 3 and 4 and remove the old one on both systems. - Back in Docusign, go to the Applications tab, select Add Configuration, and then select Custom.
- Provide a name for the integration, such as “ContractSafe,” and paste the URL you copied in step 5 of Configure ContractSafe into the URL to Publish field.
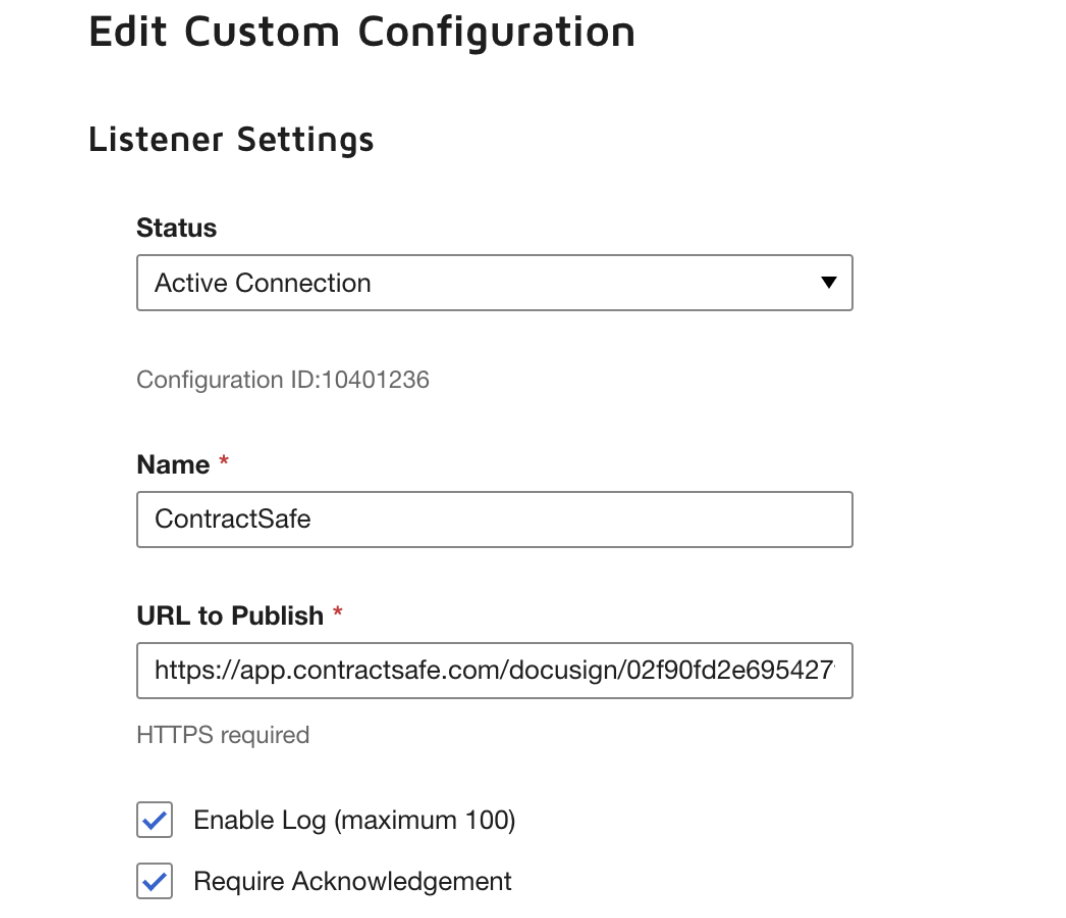
- Fill out the remainder of your settings to resemble the screenshots below.
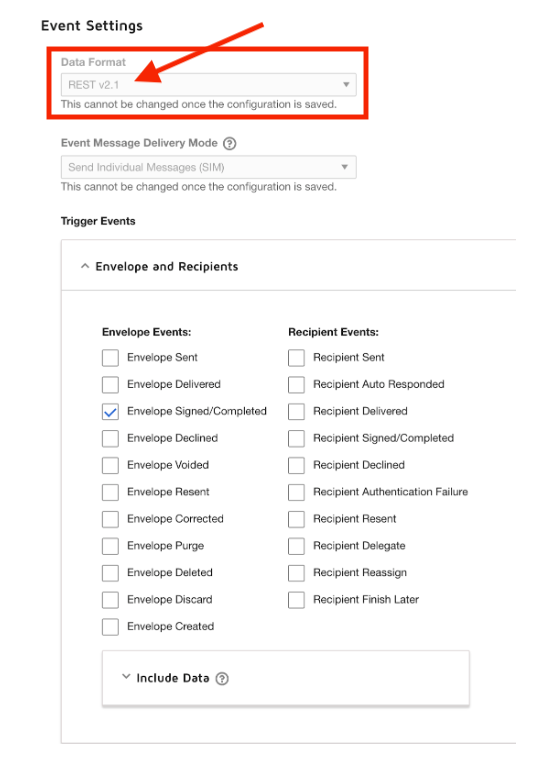
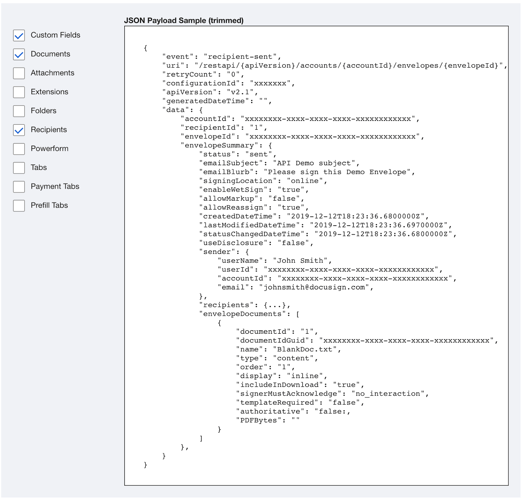
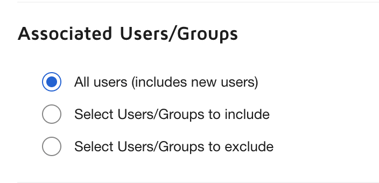
- Enable for all users or select just a few. Up to you!
- Check the Include HMAC Signature checkbox and make sure the key generated in steps 3 & 4 is in the list. The order of the list doesn't matter.
As long as one of the keys in this list is entered into ContractSafe, we'll be able to verify the authenticity and integrity of Docusign's message.
*We recommend removing unused keys.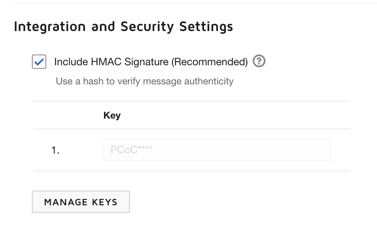
Input the new key into ContractSafe.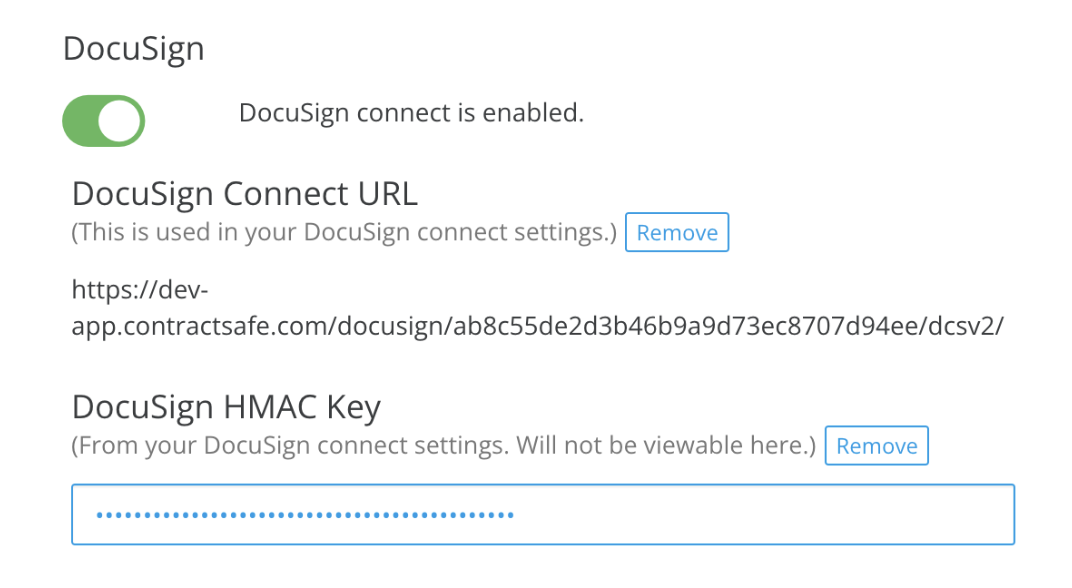
- Select Add Configuration, and you're all done!
After the integration is set up
Next, you can use Docusign custom fields to assign a folder and fill in ContractSafe data, or limit which Docusign users' documents flow into ContractSafe. If you'd rather sync both ways, see how to add the Docusign two-way integration. For more on e-signature options, see ContractSafe contract signing.
Please reach out to support@contractsafe.com for any questions.