
ContractSafe's User Groups feature empowers you to streamline user access and permissions within your organization. This article guides you through creating user groups and assigning them to relevant users.
Benefits of User Groups:
- Reduced Time Investment: Create groups for users with similar department or role needs, eliminating the need for individual permission assignments.
- Improved Consistency: Ensure consistent access levels across users within the same group.
- Simplified Management: Easily manage permissions for an entire group, streamlining user access control.
Enabling User Groups:
Note: Only users with Admin and Department Admin permission can activate User Groups within ContractSafe.
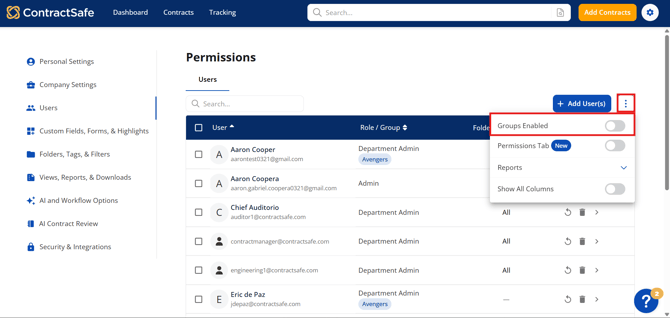
- Navigate to Settings: Access the Settings menu and select "Users."
- Click the three-dot menu, then toggle on "Groups Enable".
Creating a User Group:
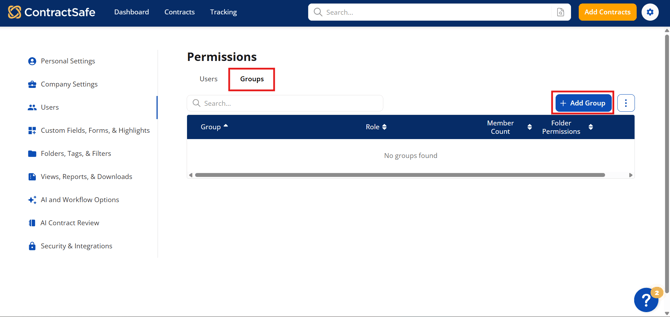
1. Go to the Groups tab and click the "+Add Group" button.
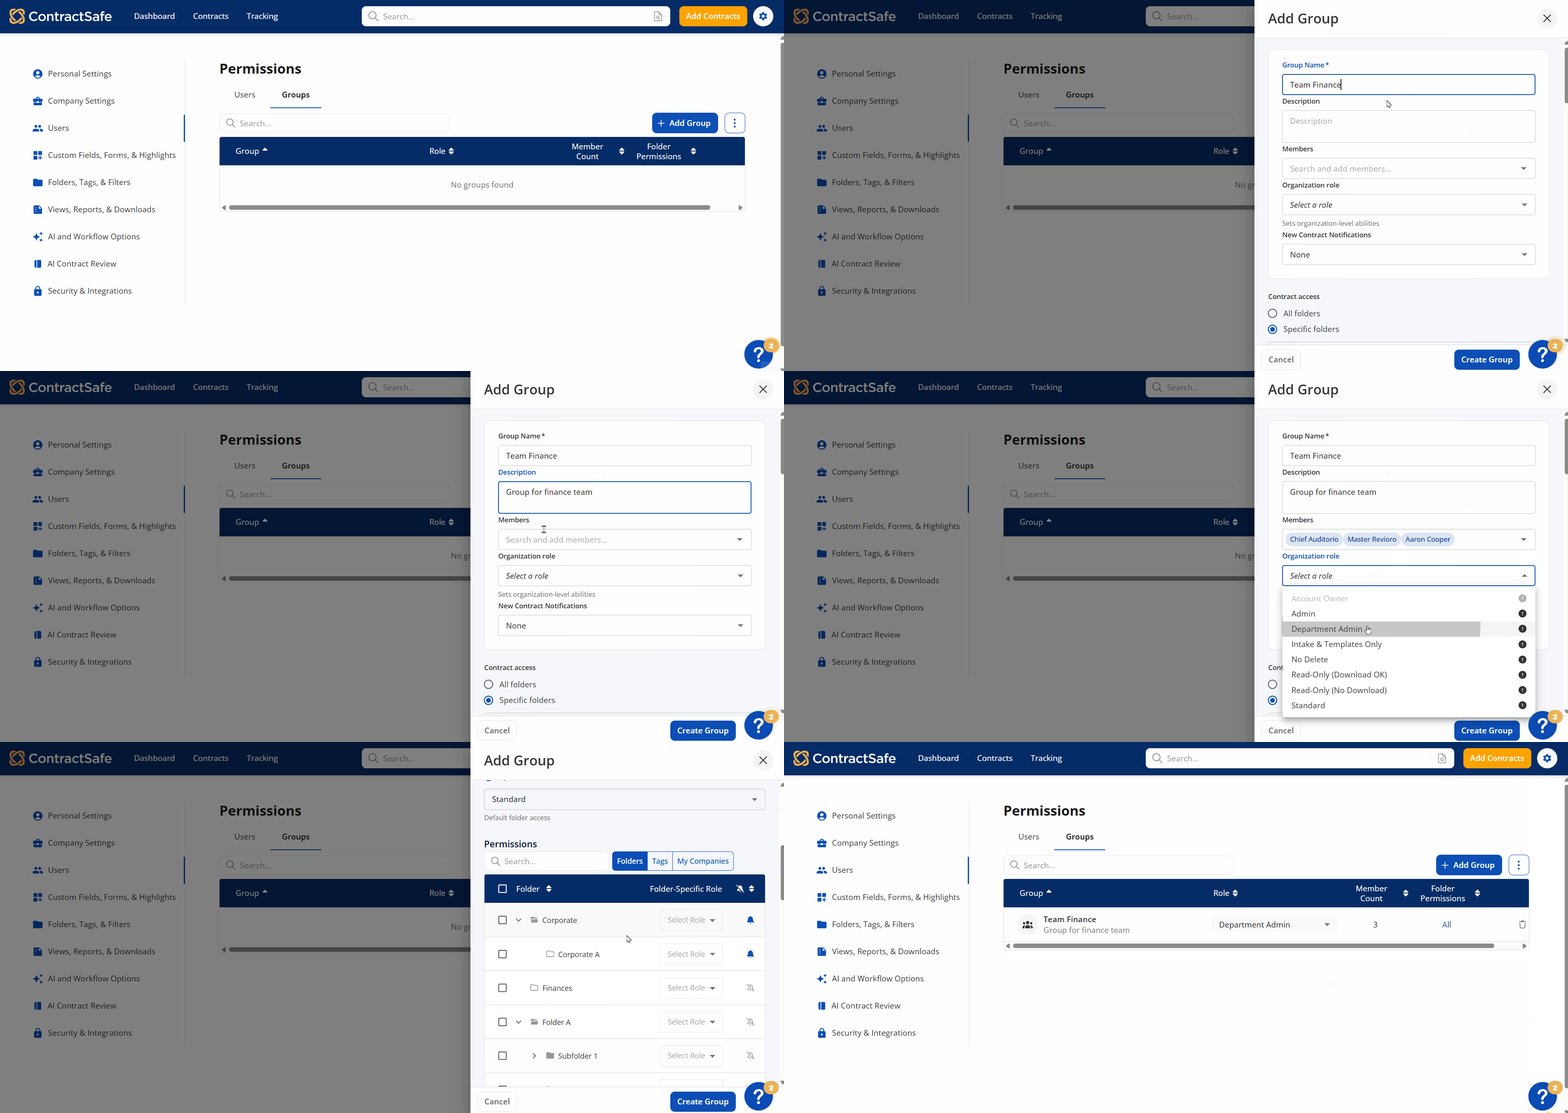
2. A panel will open on the right-hand side, where you can edit the
-
Group name
-
Description
-
Members
-
Organization Role
-
Contract Notification
-
Folder Access
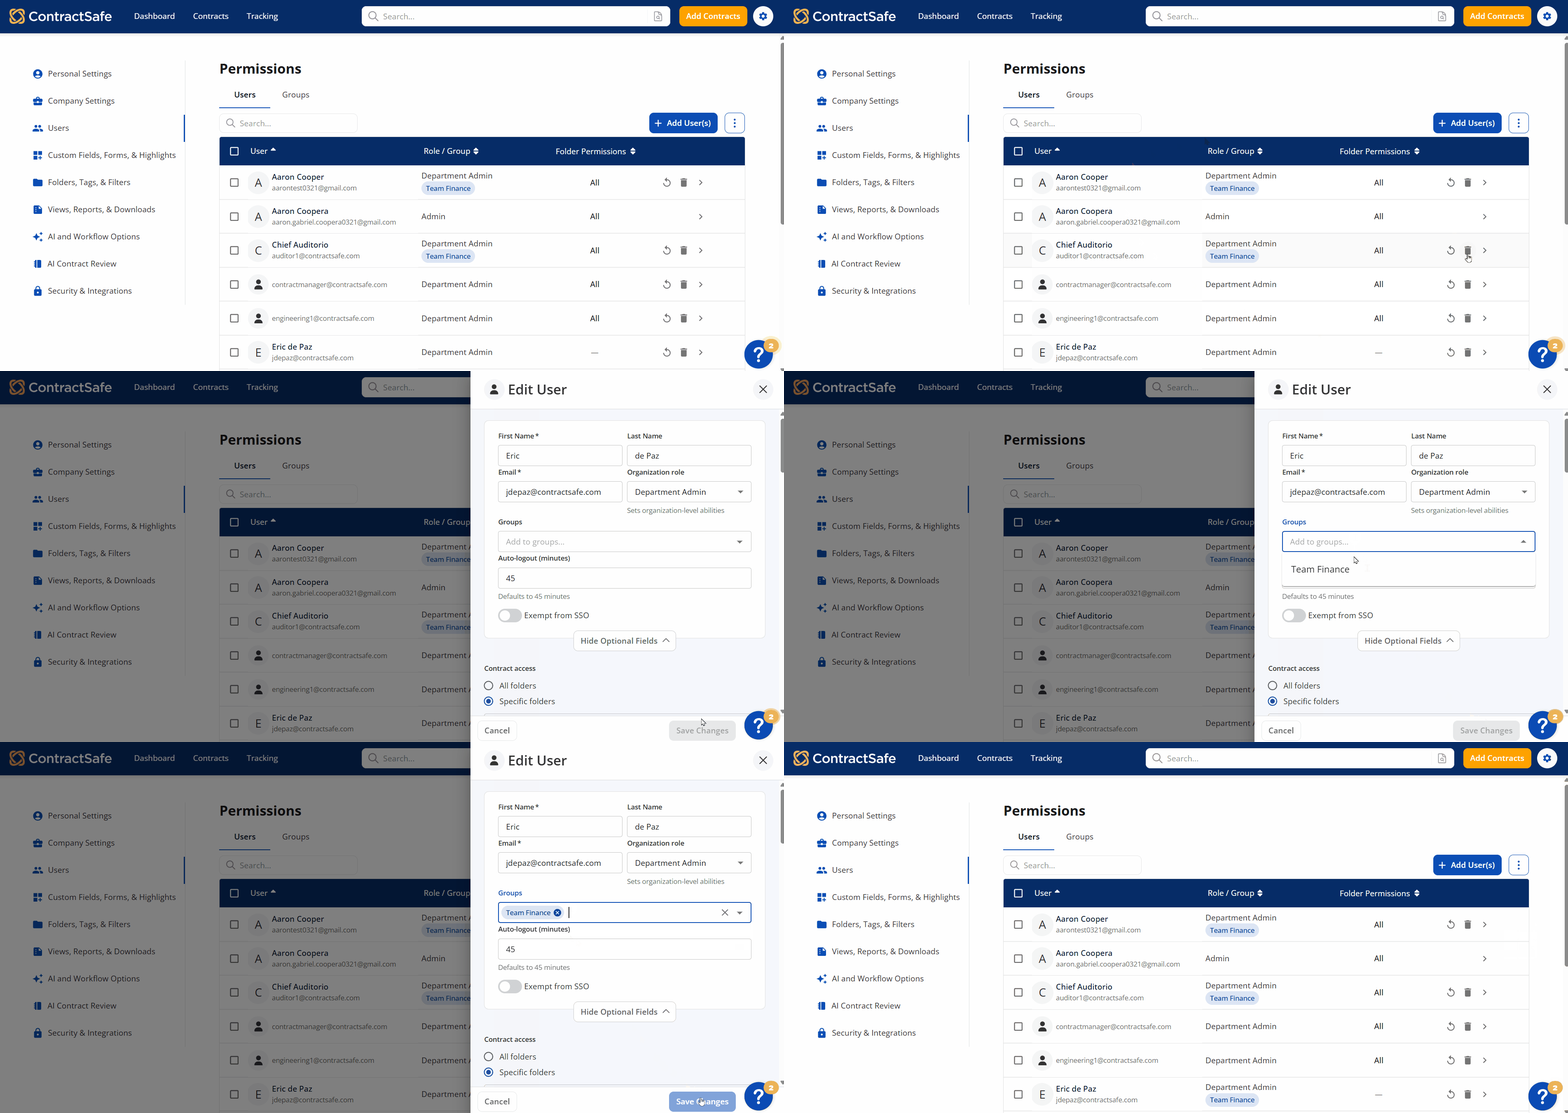
Adding Users to a Group: Wanting to add another user to the group? Here is how: Click the expand arrow next to the user's name and add them to the group and save changes.
Managing Existing User Groups: To edit permissions for an existing user group, access the "Groups" tab, select the group name, and modify the settings as needed via the arrow button to the rightmost side adjacent to the group.
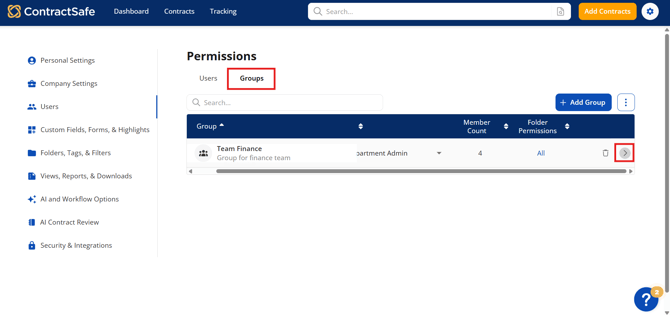
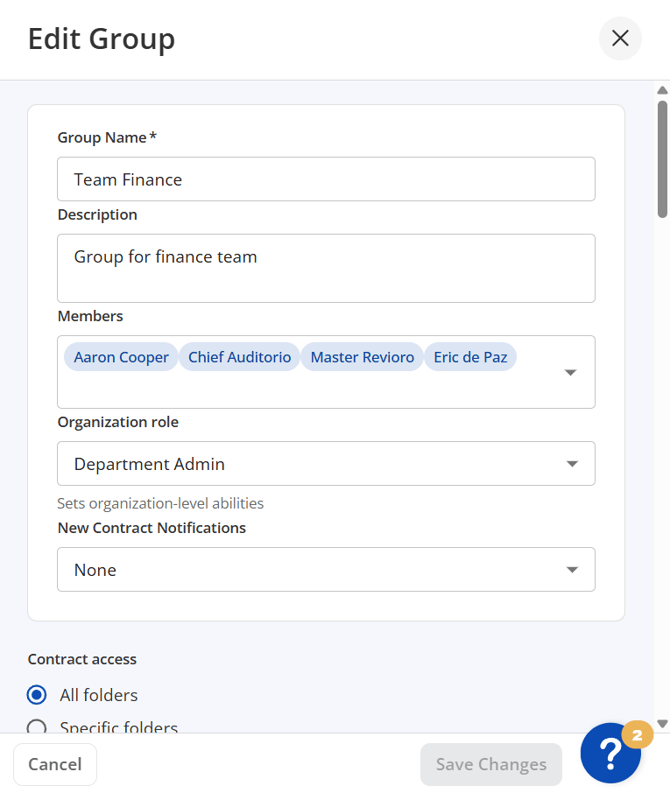
Note: If you need to change the group in anyway after it has been created, you can select Groups tab at the top right of Users screen, select the group from the dropdown list, and start making the changes from there.
You can also add multiple users and assign them to the group. Here is how to add multiple users.