Caution: Before making changes to the SSO settings please make your account SSO Excluded, admin level access is required. Here is an article on how to do it.
Note: Ensure that no more than one instance of your Azure and ContractSafe settings is active on your browser when setting up. This includes active instances on an incognito window.
Note: SSO is not enabled for Trial Accounts and accounts with subscriptions below the Finalize Plan.
Need more details? Please contact us at support@contractsafe.com; we will gladly assist you!
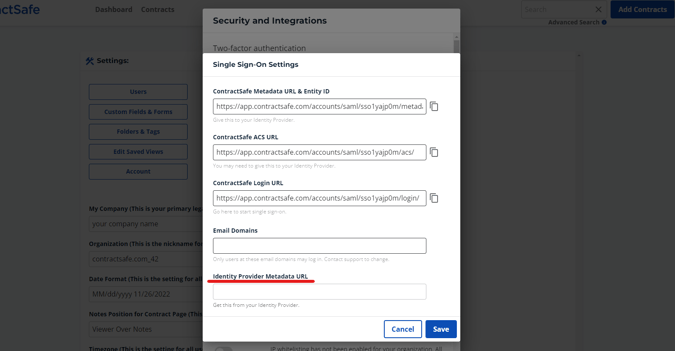
1. In ContractSafe Settings, under Security & Integrations, toggle on the Single Sign-On switch and click on the blue "Single Sign-On Settings" box.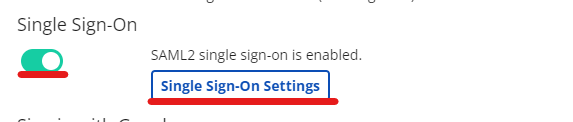
A new page will appear with the pre-filled URLs you can copy when needed. These fields cannot be edited aside from the "Identity Provider Metadata URL." We can move to the next step after the links have been generated.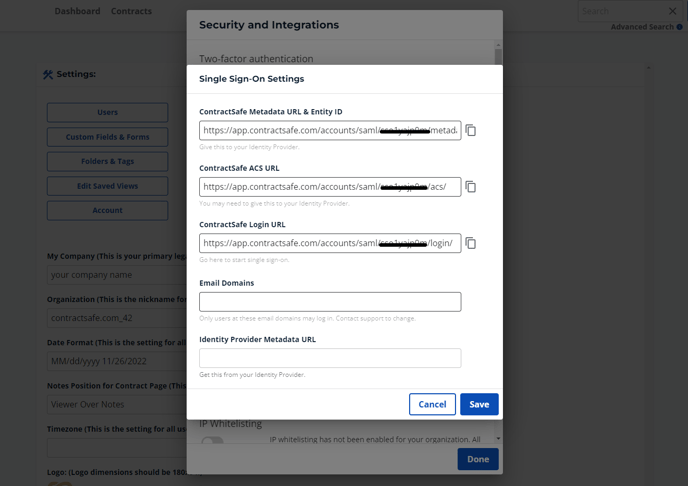
2. Log into Azure and navigate to Portal. From there, select Azure Active Directory.

3. From the menu on the left, click on Enterprise Applications. Click on New Application, then Create Your Own Application:


4. Assign a name to your application and click Create in the bottom right.
IMPORTANT: DO NOT USE THE EXISTING CONTRACTSAFE INTEGRATION.
5. Click on Users and Groups in the menu on the left, and then click on Add user/group.

6. Click on Users - None Selected and select the users you would like to allow access from the panel on the right. Click Select when you are done.
NOTE: Ensure that the users have Role Assigned set to User

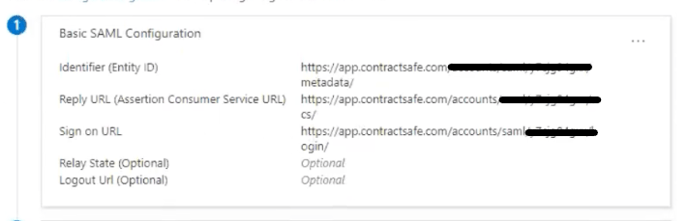
7. From the menu on the left, click on Single sign-on, and then select SAML. Populate the Identifier field with the ContractSafe Metadata URL & Entity ID and the Reply URL field with the ContractSafe ACS URL from ContractSafe Settings -> Security & Integrations.
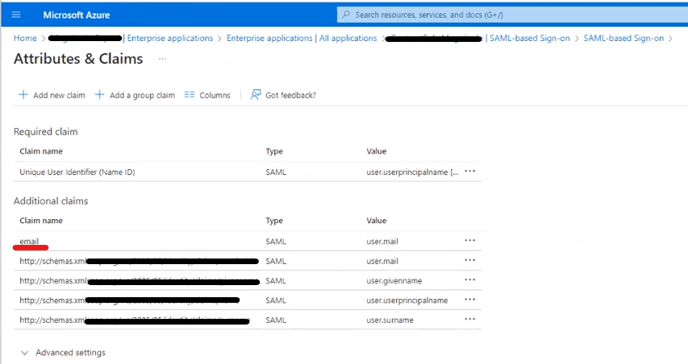
IMPORTANT: Ensure that the claim email corresponds to the value user.mail
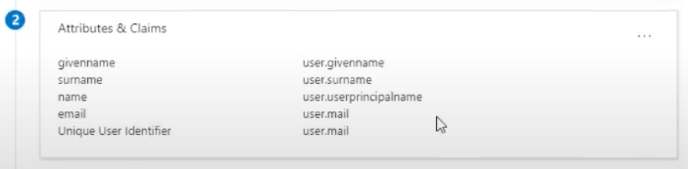
Double check by editing the Attributes and Claims, and make sure that the claim name for email isn't a link such as "http://schemas.xxxx". It must only be "email"
8. Back in Azure, under the "SAML Signing Certificate", copy the App Federation Medatada URL and paste it to your ContractSafe SSO settings under the Identity Provider Metadata URL.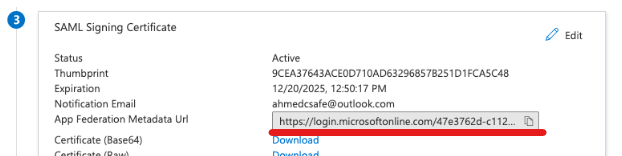
9. Contact ContractSafe support at support@contractsafe.com and submit your company's email domains. Only users at these email domains may log in—contact support again if you wish to change an existing domain.
- End of step-by-step instruction -
Note: You can access the application using the three options below.
1. Bookmarking the User access URL under Properties (in your Azure Settings)

2. Clicking the ContractSafe App Icon from myapps.microsoft.com

3. You can also authenticate using the Login with SSO button on the homepage.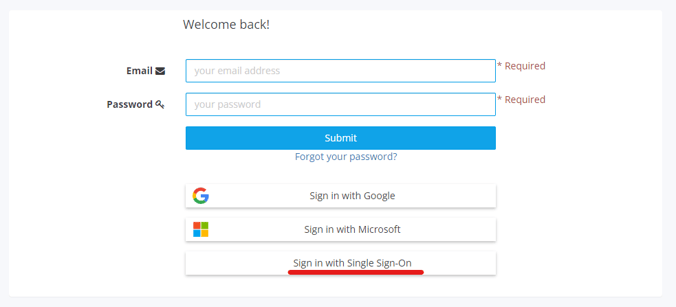
Please feel free to reach out to support@contractsafe.com for any questions.