
We are thrilled to announce the launch of a highly requested feature in ContractSafe: Custom templates!
This new feature empowers you to streamline the Contract Creation process and ensure consistency across your documents. In this article, we will guide you step-by-step on how to create templates in ContractSafe.
Let's get started!
Step 1: Enable Templates in ContractSafe
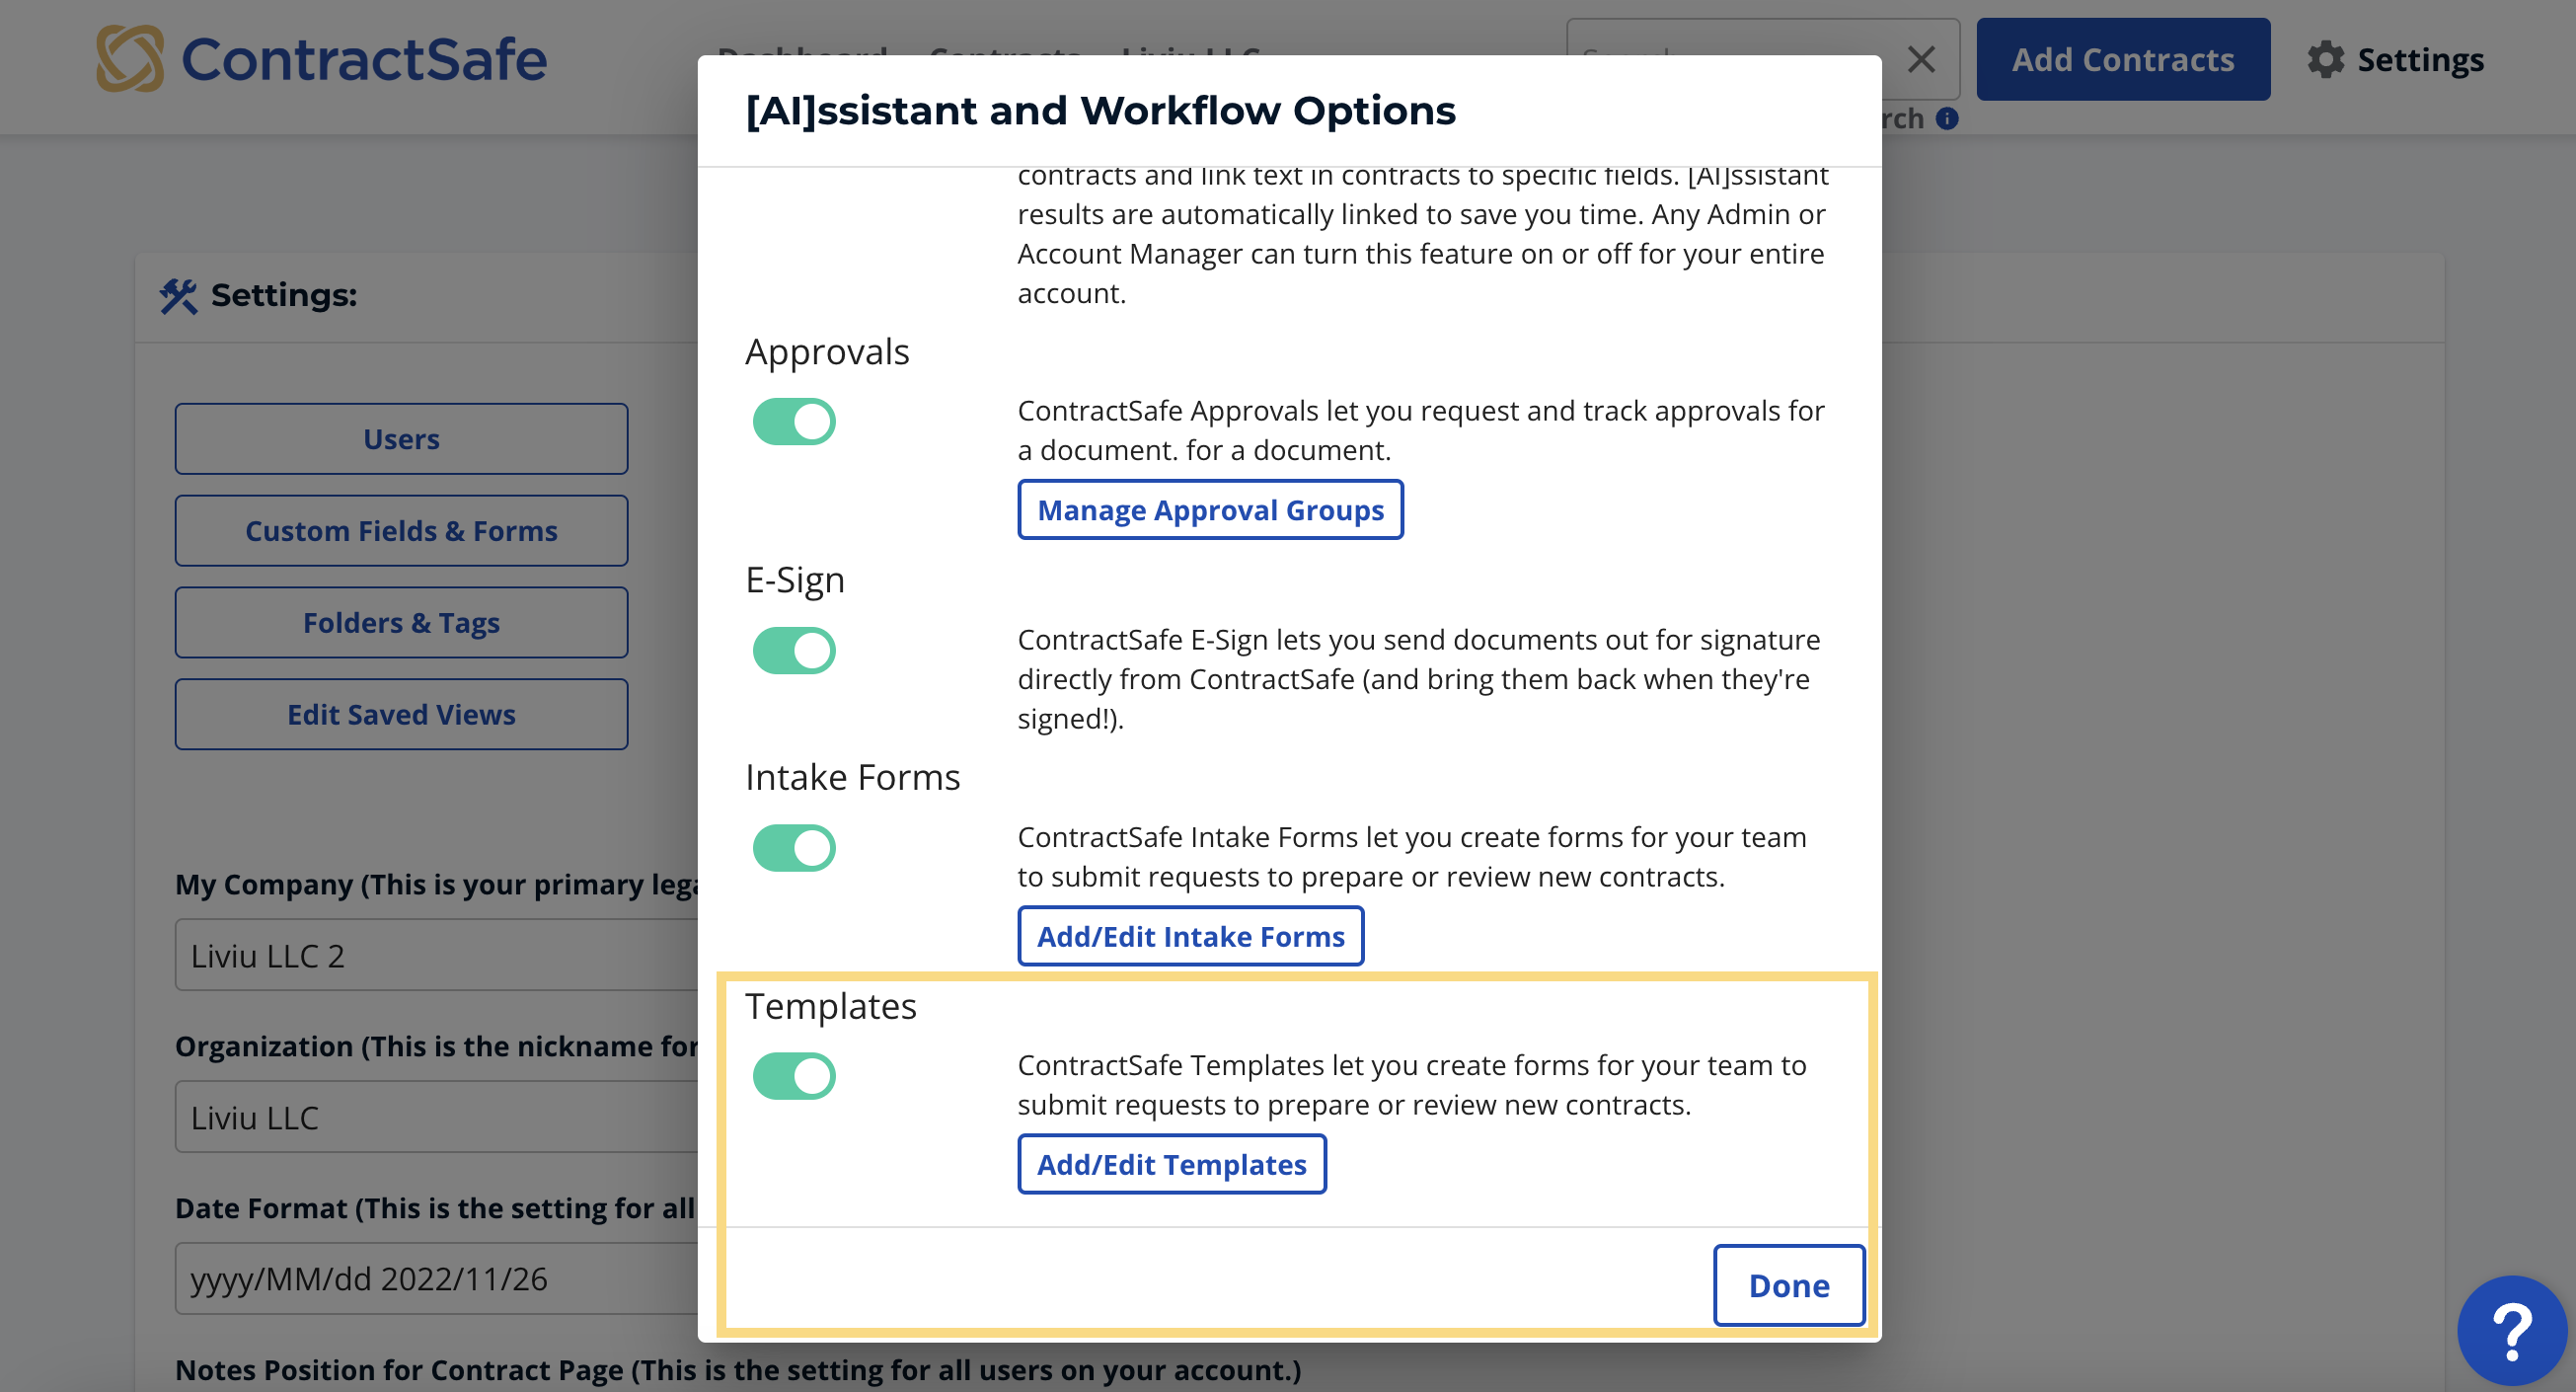
Before you begin creating templates, ensure that templates are turned on in your ContractSafe account. Go to the "Settings" menu, navigate to the "AI and Workflow Options" section, and make sure the templates feature is enabled.
Step 2: Adding a New Template
- To create a template, click on the "Add/Edit Templates" option on the Open the AI and Workflow Options panel.
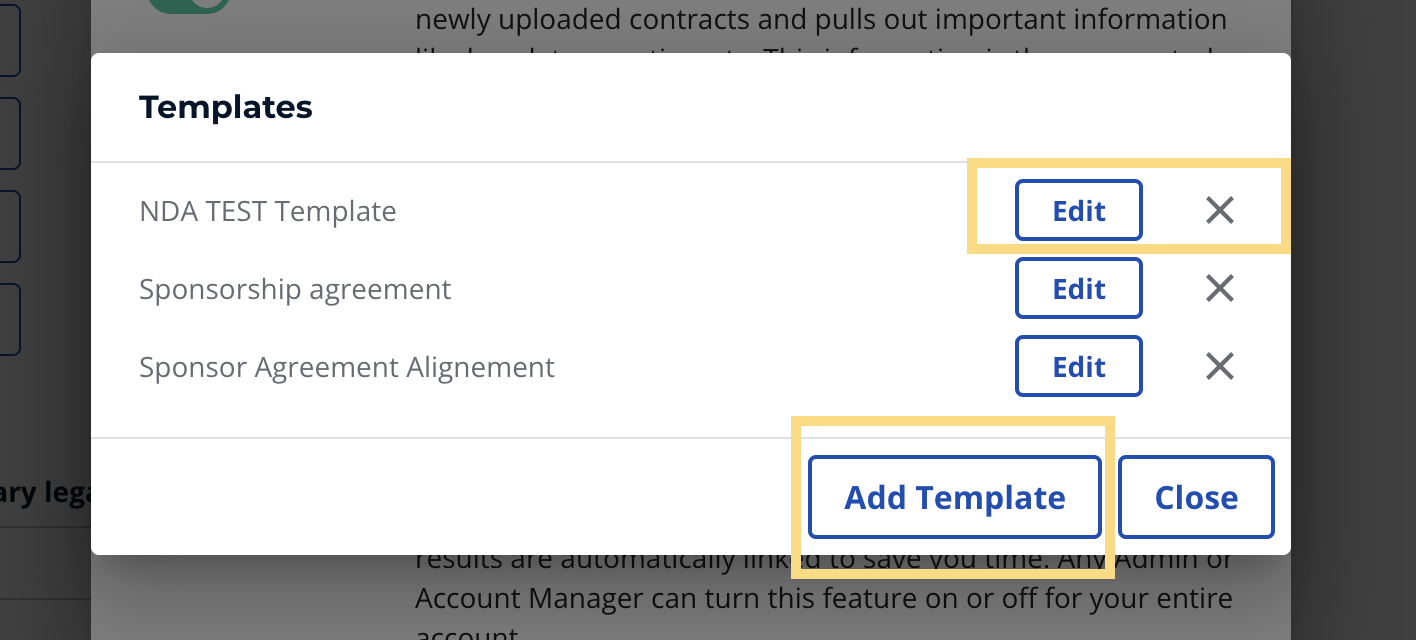
- Next, select "Add Template" to start the template creation process.
Step 3: Setting Up the Template
- Provide a descriptive name for your template. This will help you easily identify and select the template when creating contracts.
- Choose the folder where contracts created using this template will be stored for organization and easy access.


* NOTE: The next three steps we will be discussing the three types of fields you can add
Step 4: Defining Document Fields
- Choose which Document Fields your template will need. These are fields you will place within the template word file.
- End users will be required to fill in these fields


Step 5: Adding Optional Fields
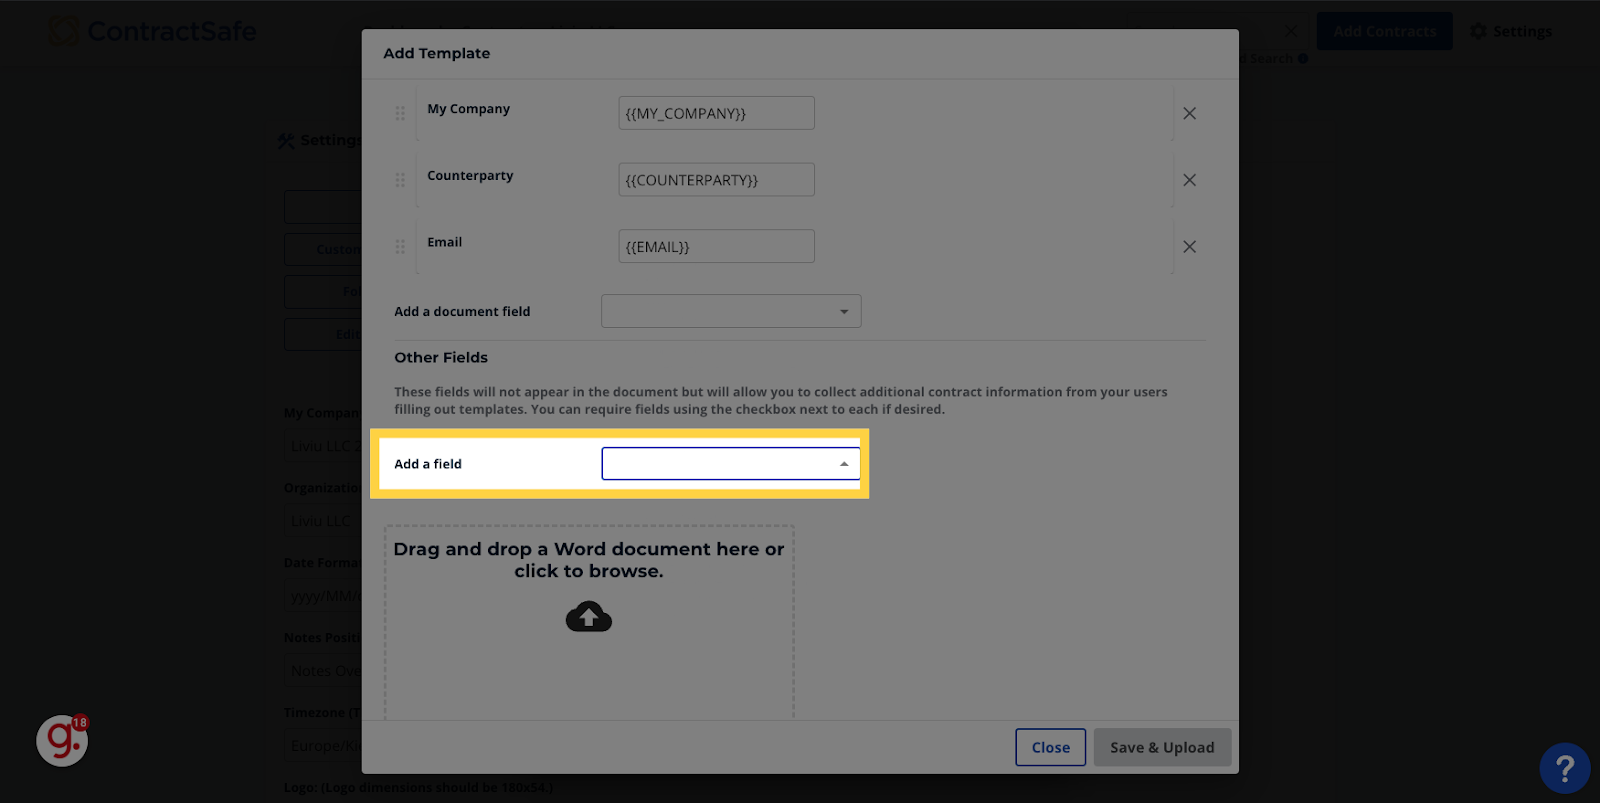
- Optionally, you can include "Other Fields" to associate with this template that won’t appear within the document. These fields can be filled out by users during the contract creation process.
- You can choose to require users to fill out these optional fields or leave them as optional based on your organization's needs.
Step 6: Adding Hidden Fields (Optional)
- "Hidden Fields" are fields that won't appear within the document and are not visible or editable by end users.
- You can associate Hidden Fields with the template to capture internal information or data that doesn't need to be shared with users.


Step 7: Uploading the Template
- Open the Word document** containing your template fields.
- Ensure all Document Fields and optional Hidden Fields are added correctly.
- Upload the Word document as your template within ContractSafe.
** the document must be in word format. You should see “.docx” at the end of the file name
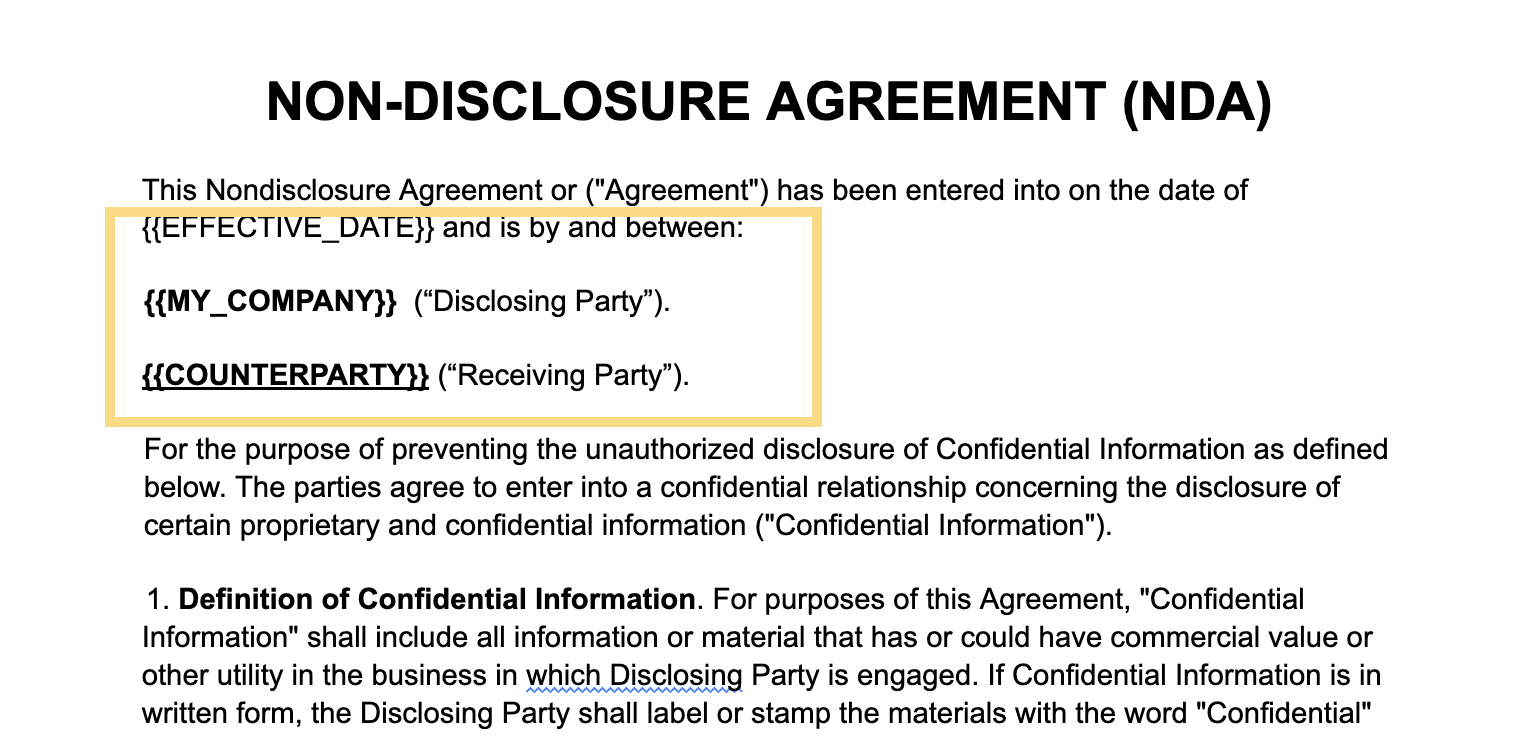
NOTE: Document Fields are essential placeholders within your template that end users will fill in when creating contracts. Identify the necessary Document Fields and place them within your template Word file.
You can format the variables using options like bold (B), italic (I), underline (U), etc. Apply the formatting to the entire field, including the squiggly brackets, to have it applied when the end user fills out the template.
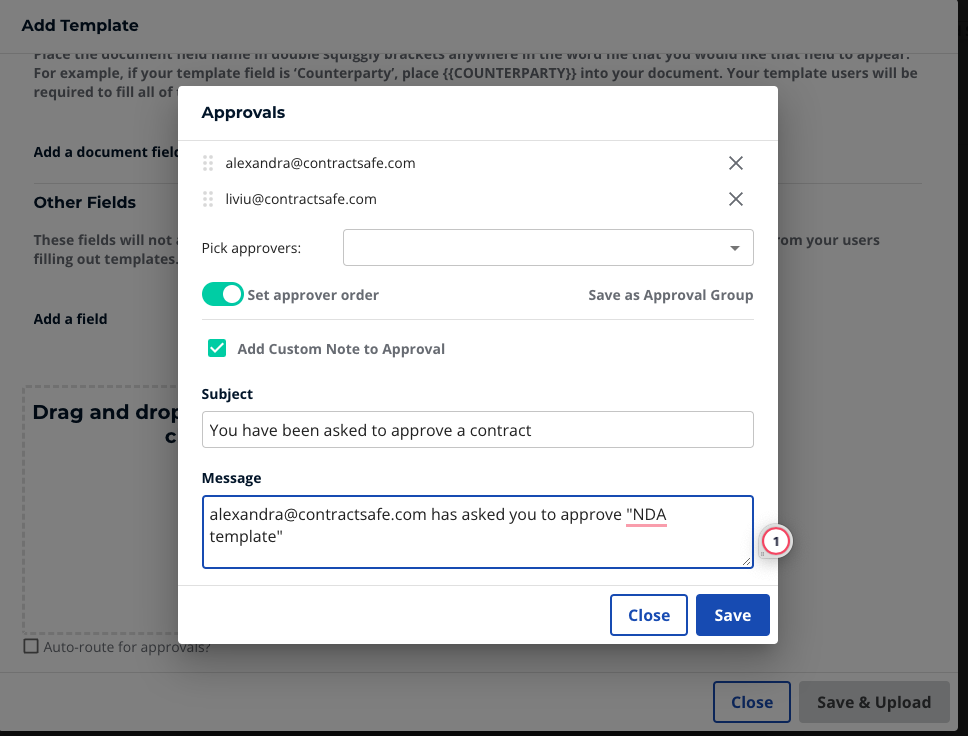
Step 8: Approval Options (Optional)
- Optionally, you can choose to automatically route contracts created from this template to specific individuals or groups by selecting the "Auto-route for approvals?" option.
- This streamlines the approval process and ensures contracts reach the right people promptly.

Step 9: Saving and Uploading the Template
- Click on "Save & Upload" to save the template within ContractSafe.
- Congratulations! Your template is now ready to be used by users in your organization for contract creation.
Conclusion:
Creating templates in ContractSafe is a game-changer for streamlining contract creation and ensuring consistency across your documents. By following the simple steps outlined in this article, you can upload custom templates and simplify the contract creation process for your organization.
- How to Allow Non-users to create contracts via the Templates & Intake Forms
- NEW* Create contracts using Templates directly from a submitted Intake Form
Please reach out to support@contractsafe.com for any questions.