
ContractSafe's integration with Docusign lets you send contracts for signature and receive the updated version, all through ContractSafe. There are two integration types: one-way pushes fully executed Docusign contracts into ContractSafe, and two-way lets you send documents from ContractSafe to Docusign. To set it up, you must be on our Finalize or Maximize plans and be an admin on the account; you start in Settings > Security & Integrations.
Table of contents
- Different integration types
- Enabling in ContractSafe
- Creating and adding keys
- Setting up Docusign integration
- Setting the default Docusign account
- Setting a different account to receive contracts
- How the integration works
- FAQs
- One-way vs. two-way integration
What Docusign integration types are available?
There are 2 integration types available:
- 1 way: With your fully executed contracts in Docusign, you can have them pushed into ContractSafe.
- 2 way: In this version, you'll start in ContractSafe and send your documents for signature through a Send to Docusign button. Once signed, your documents will automatically be updated with the signed version in ContractSafe (with the original saved as an attachment).
We'll cover the setup for both below. For step-by-step guides to each, see the Standard one-way Docusign integration and the Docusign two-way integration.
Enable the integration in ContractSafe
To set up the integration, you must be on our Finalize or Maximize plans and be an admin on the account.
- Go to Settings > Security & Integrations.
- Toggle Docusign to enable it.

Create and add your keys
In ContractSafe
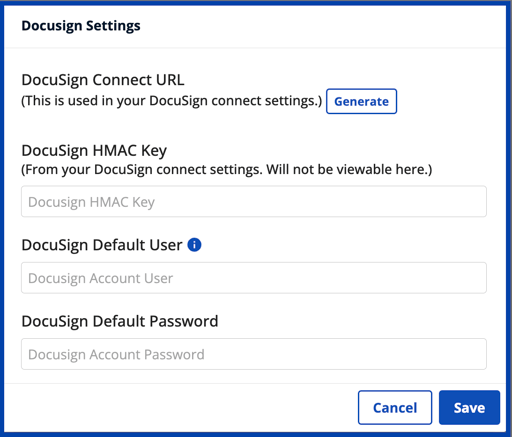
Select Docusign Settings and click Generate on the pop-up window to generate a webhook URL.
REMEMBER: Copy the URL and Save (You'll need this when you log into Docusign in the next section)
In Docusign
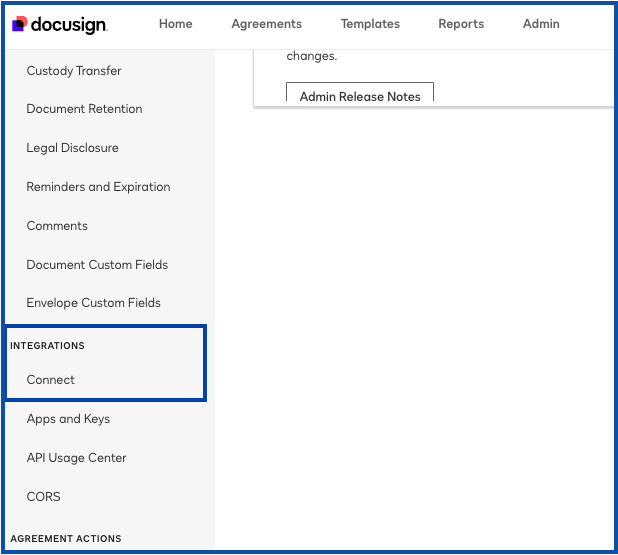
In your Docusign Admin account, select Settings > Connect, found under Integrations.
If you don't see Connect listed, reach out to Docusign to see if it's a part of your plan and to turn on this feature.
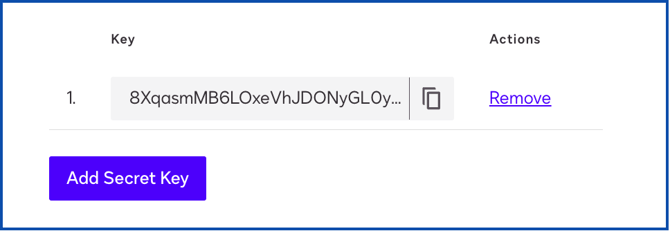
Select Connect Keys > Add Secret Key.
Note: Copy the generated secret key and save it somewhere safe. This is the only time you'll be able to see it in either application.

Make sure the keys you generated above are in the list. The order doesn't matter. As long as ONE of the keys from this list is added to ContractSafe, we can verify your Docusign account.
*It's recommended that you remove any unused keys.
Back in ContractSafe
Enter your generated HMAC key into the field labeled Docusign HMAC Key, scroll down, and click Save.
Set up the Docusign Connect configuration
- Go to the Configurations tab and select Add Configuration > Custom.
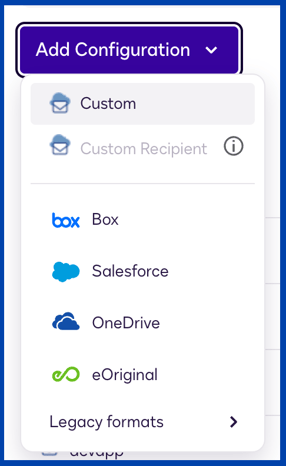
- Name the integration (ContractSafe, for example) and paste the URL that you copied above into the URL to Publish field.
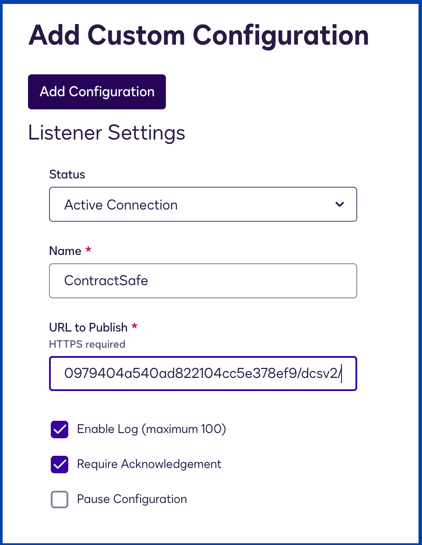
- Fill out the rest of your settings as shown below.
IMPORTANT: adding anything other than what is listed below could cause things to break.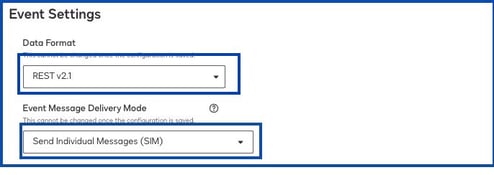
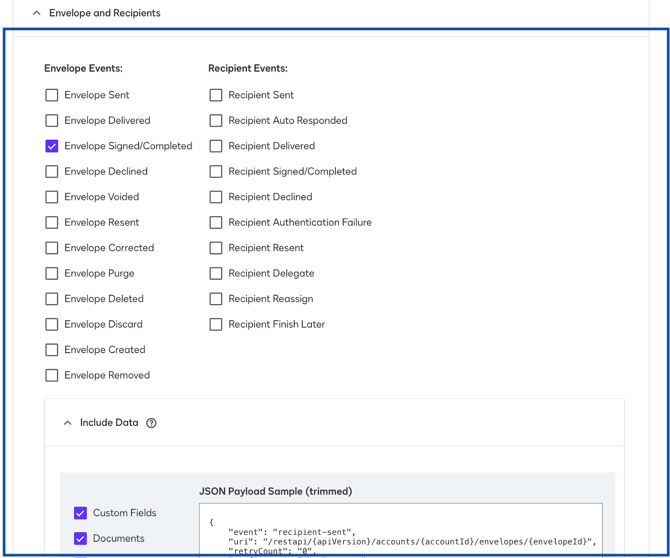
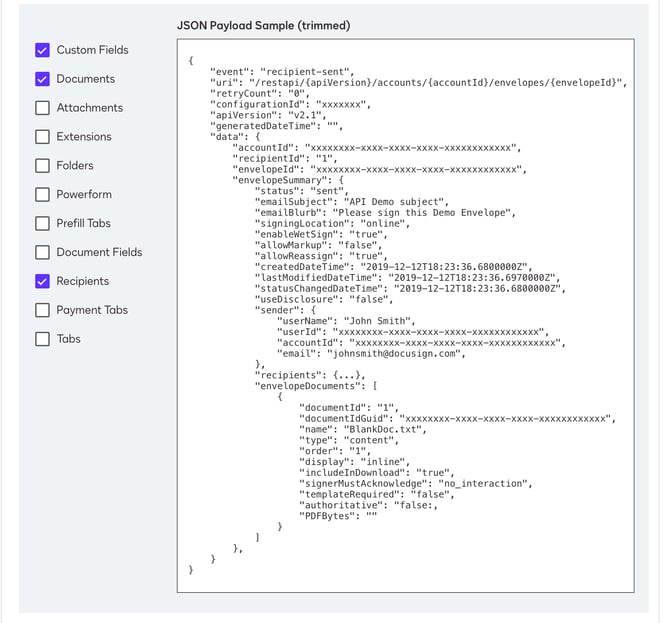
- Enable for all users or select just a few. Up to you! To change this later, see how to limit which Docusign documents flow into ContractSafe.
- Important! Make sure you select Include HMAC Signature (Recommended) in the Integration and Security Settings section.
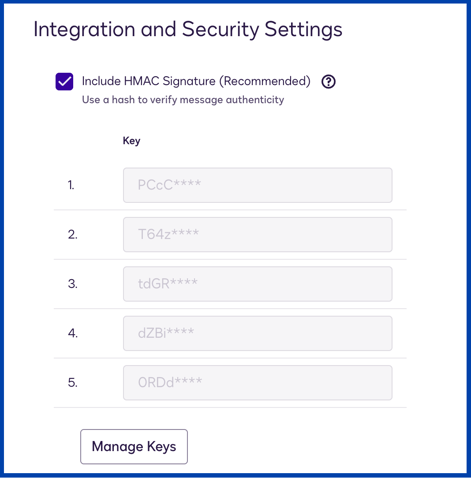
- Select Add Configuration at the bottom of the page.
If you just want a one-way integration, you can stop here. Otherwise, continue to the next section!
Set the default Docusign account for the two-way integration
After completing the steps above, you'll want to set the default Docusign account that will receive contracts from all users.
- Click Settings > Security & Integrations > Docusign Settings.
- Below the Docusign button, input your Docusign login email into Docusign Default User, and input your Docusign password into Docusign Default Password.
- Select Save. This will be the default account that receives contracts sent to Docusign by any user.
For the service-account (JWT Grant) setup, see how to migrate your Docusign integration to JWT Grant.
Set a different account to receive contracts
If you want to receive contracts into your own personal drafts folder in Docusign, you can enter your own credentials.
- Go to Settings > Personal Settings > My Connections.
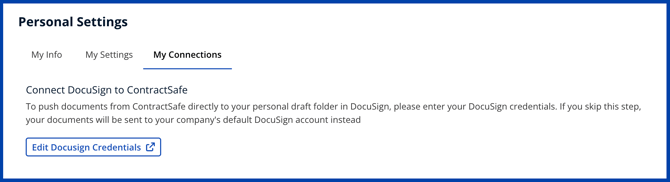
- Select Edit Docusign credentials and fill in the username and password.
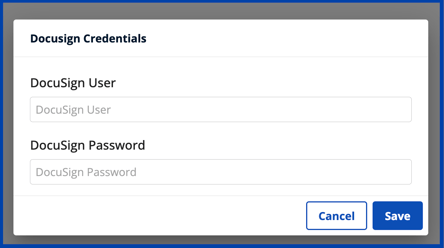
- Select Save.
How the two-way integration works
- With everything set up and connected, you'll have a new option when you're on the contract page. Select Send.
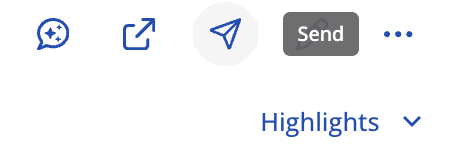
- A new button for Send to Docusign will be available.
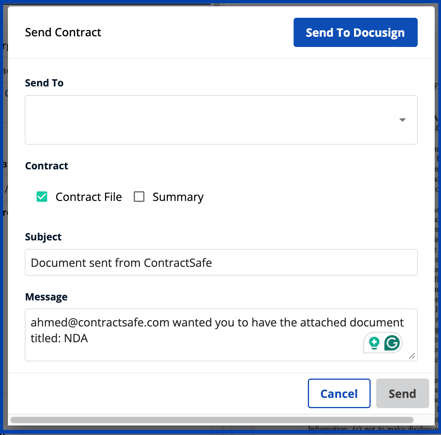
Note: You don't need to worry about the Send To, Subject, or Message, as this is only sending the document to Docusign, where you'll complete all the necessary steps. - Once sent, your document will appear in the Drafts folder of your Docusign account.
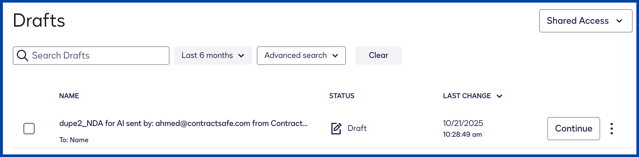
- From there, select your document and add recipients as you're used to.
Adding envelope custom fields
One new thing you'll see is custom fields. These are a list of fields we support that will automatically be filled out on the contract. You can configure those custom fields in your Docusign Admin Settings; see how to use Docusign custom fields with ContractSafe.
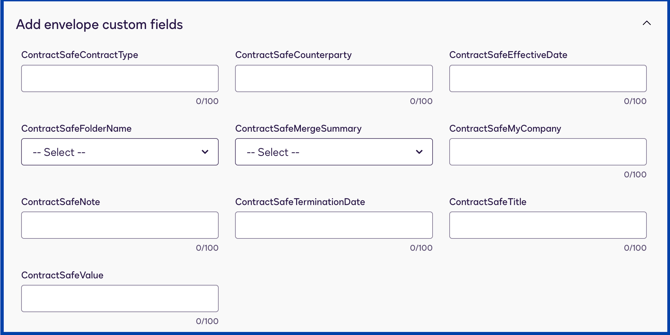
Once all signatures have been completed, the fully executed document will automatically be added to ContractSafe.
Docusign integration FAQs
Things that could go wrong, and what to check for.
E-signature status updates
Some customers experienced issues where contracts weren't showing as "Signed" in folders after completion.
- Issue with "Envelope Signed/Completed" settings not being enabled on Docusign
Integration setup problems
- Difficulty in setting up Docusign credentials
- Problems with Custom fields and GPE settings
Document processing
- Documents not being processed as expected after signing
- Error messages appear after documents are fully executed
- Documents resulting in blanks after signatures are completed when on the search view. To fix this, go to the Contract Page > More button > Download > Original Document > Replace the blank contract with the downloaded file. You can keep the blank file as an attachment, but to be able to search, highlight, and use other features you'll need to replace the contract file.
Email notifications
- Delays in receiving signature notifications
- Emails sometimes go to spam folders
- Missing email notifications for signature requests
What's the difference between one-way and two-way integration with Docusign?
ContractSafe offers two layers of integration with Docusign.
Sometimes in large organizations, certain teams (we're looking at you, Sales!) aren't always great at sending in their signed contracts. The One-way Docusign integration connects your Docusign account to ContractSafe, and then any time a contract reaches the fully executed stage with Docusign, the contract is pushed automatically into ContractSafe as a new contract. It's an easy way to keep every signed contract in ContractSafe, where the whole team tracks it!
The Two-way Docusign integration is for our customers who prepare drafts in ContractSafe and prefer to sign in Docusign. It connects your Docusign account to ContractSafe, and you're able to send a final draft from ContractSafe to Docusign for signing. "Push" it to Docusign, then set up the signing process as usual in Docusign. Once it's fully executed, it will come back to ContractSafe and update the existing contract record. ContractSafe will automatically replace the draft with the executed version (and save the draft for record-keeping), and mark the contract as fully executed.
Prefer not to use Docusign? See ContractSafe's built-in contract signing.
If you're experiencing any issues, your CSM can help guide you through the troubleshooting process. Please reach out to your CSM or our support team for help at [email protected].