How do I create a scheduled report?
You can schedule any report and set it up to be sent to any number of email recipients on any regular schedule you'd like, even way in advance! Just follow these steps.
1) Select the Saved View you want to send as a Scheduled Report. See: How to See Different Saved Views. If you haven't already created a Saved View, you can create it with the information you want included in the report. See: How to Create Saved Views.
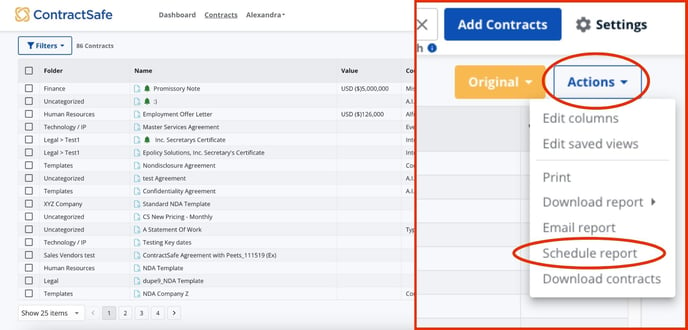
2) Select Actions and then Schedule Report.

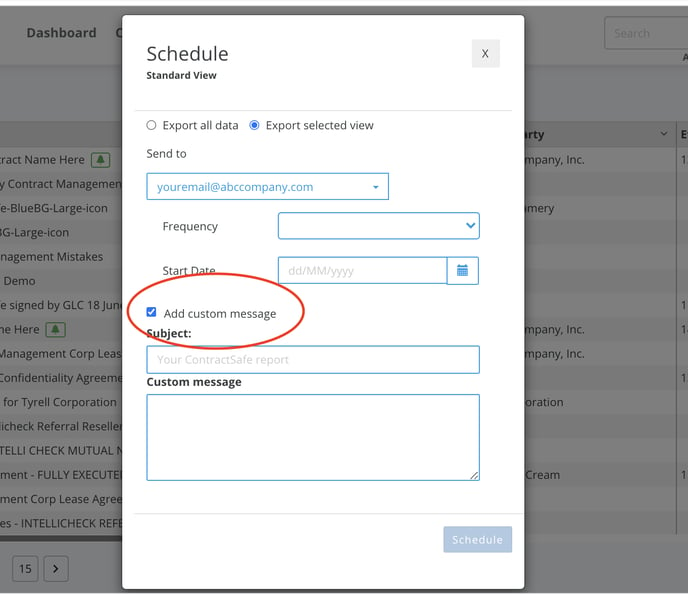
3) You can then choose the recipients, the date the report should first go out, and how often it will be sent. You can even add a custom message!

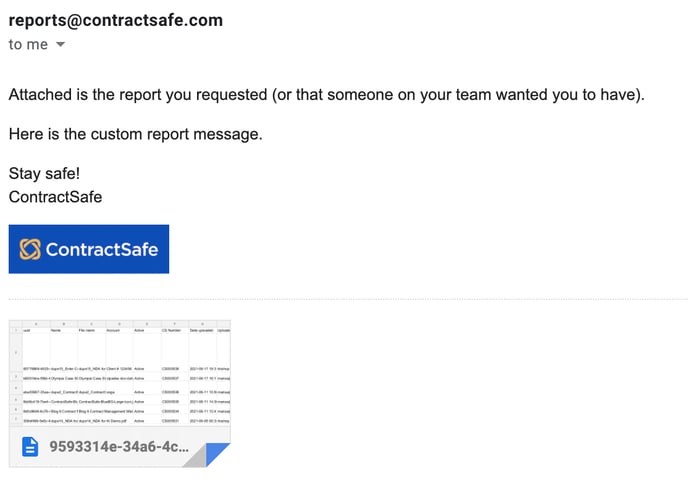
4) Here is what your recipients will see in their inbox with the report attached as a CSV file.

Just sit back, relax, and wait for the report(s) to be rolled out like clockwork according to the instructions you have configured.
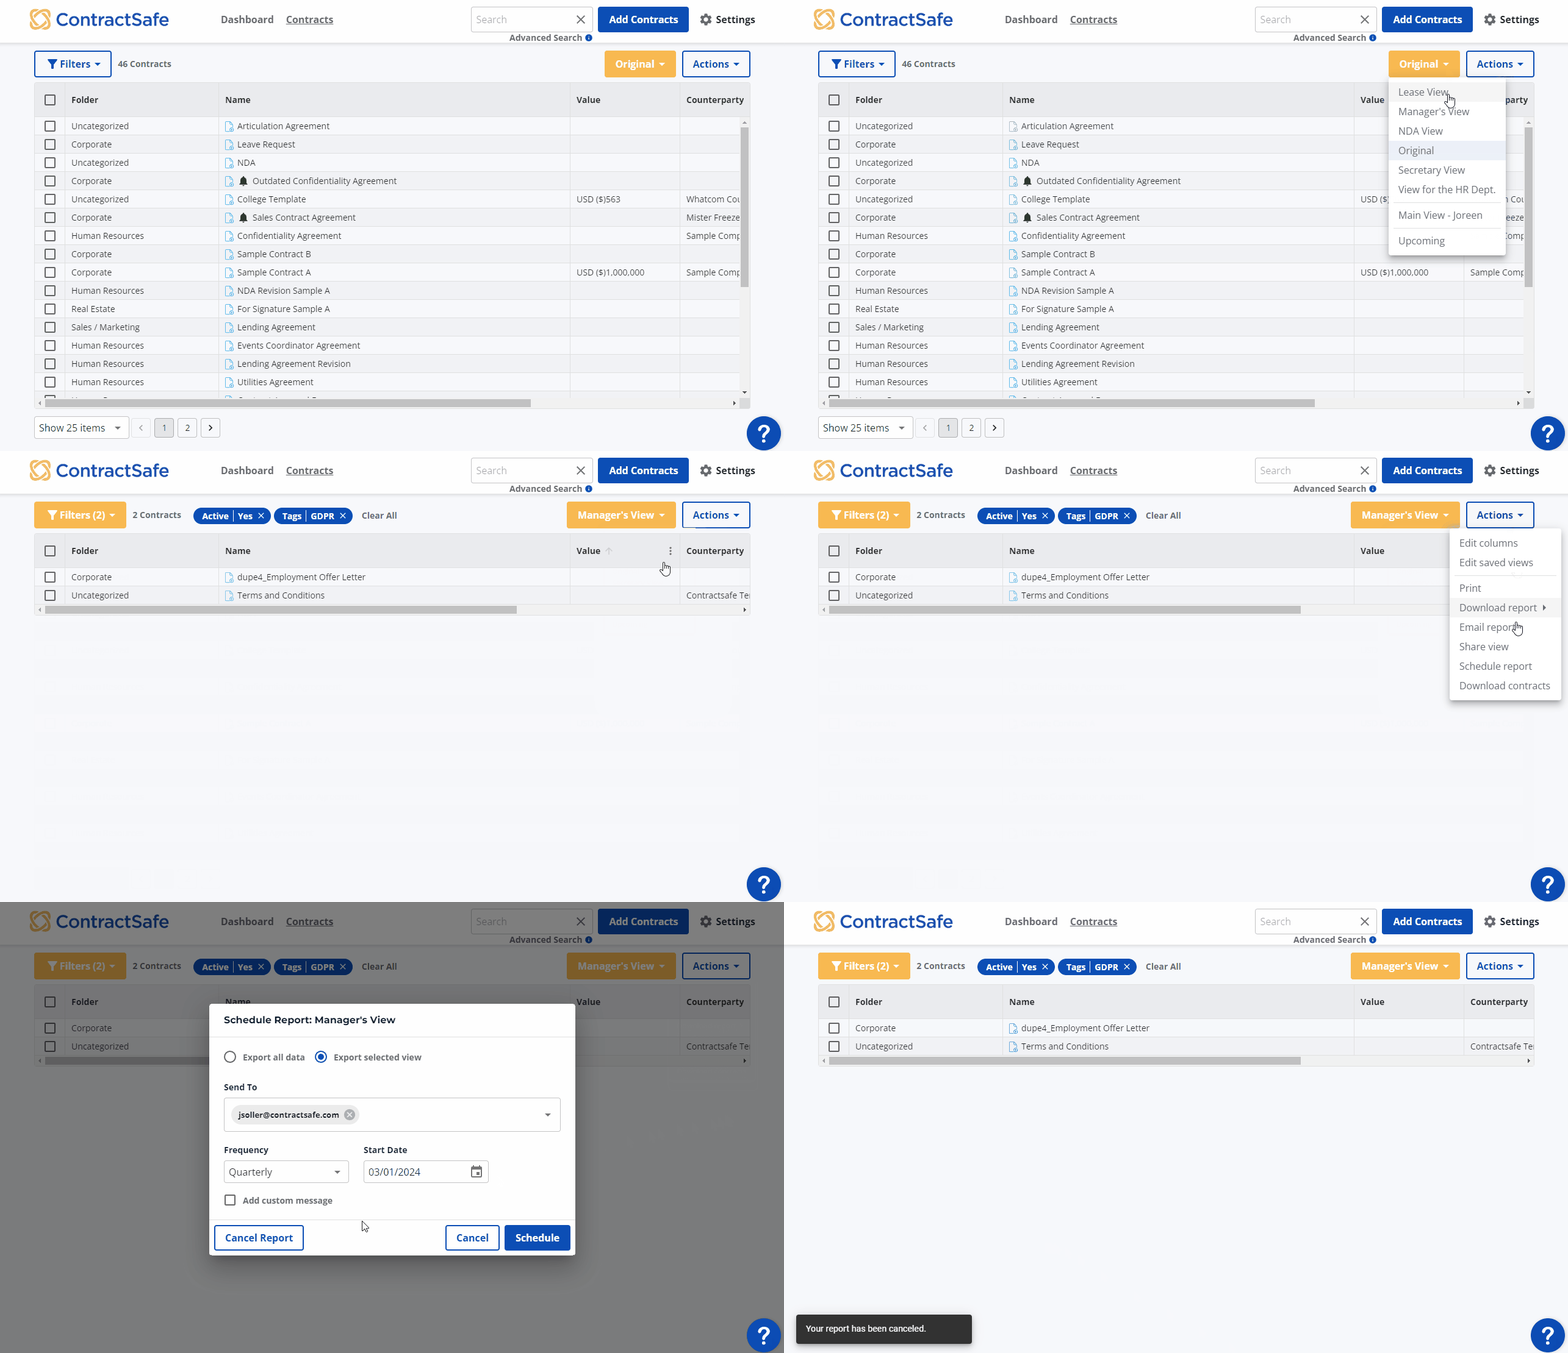
Tip: To stop/cancel a scheduled report, find the View with the Scheduled Report, it could be a Saved View or the Original View.
Once the view is opened, go to the "Actions" dropdown, click on "Schedule Report", and the option to cancel the report should appear on the small window that will pop up.
Here's a quick animation that shows how it's done.
Please reach out to support@contractsafe.com for any questions.