
Table of Contents:
- Enable Templates in ContractSafe
- Adding a Template
- Auto-route for approvals
- Uploading a document
- Creating a contract from a template
- Previewing the contract
Templates are available to customers on the Maximize plan.
Enable Templates in ContractSafe
To turn on the Templates feature, go to Settings > AI and Workflow Options 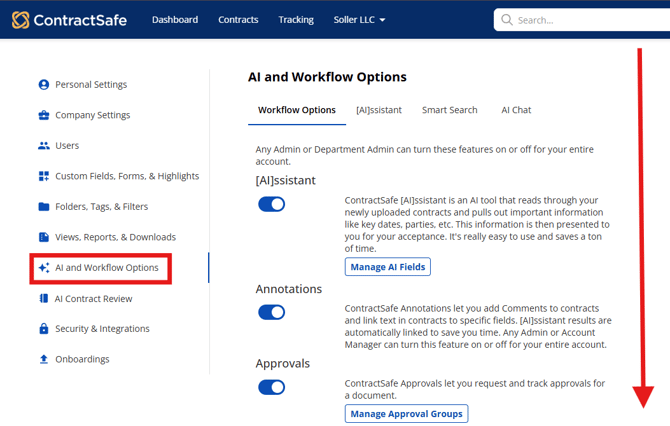
Scroll down and turn on Templates: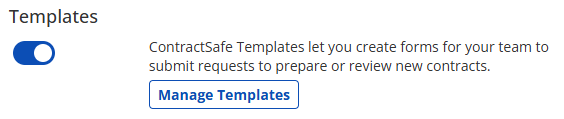
Adding a Template
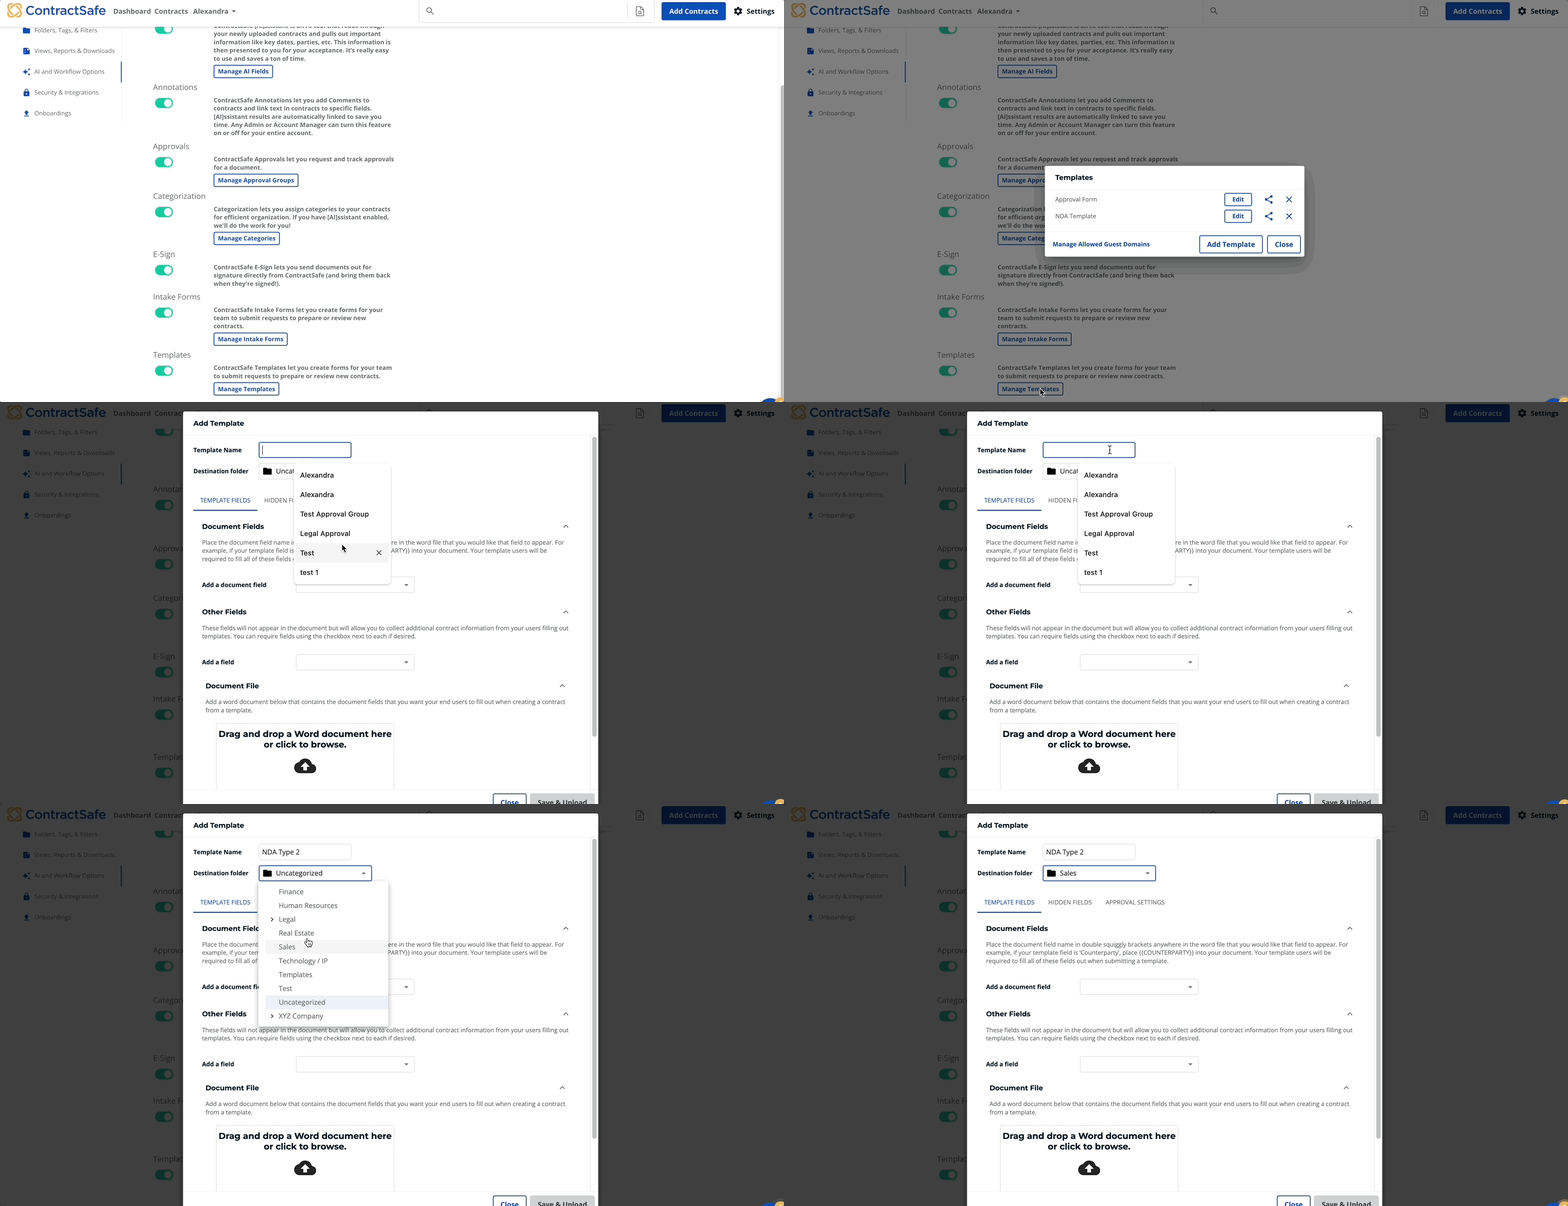
To add a new template, from the settings page, select Manage Templates > Add Template
Choose a template name. Then select the destination folder contracts created with this template will be stored:
Add fields to your template
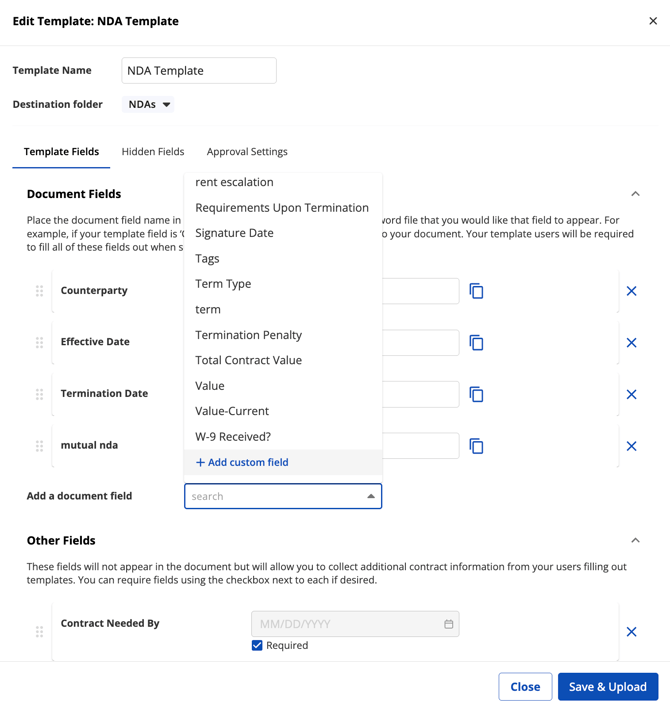
Choose the document fields your template will need. End users will be required to complete these fields when creating a contract.
If you need a field that does not exist yet, you can create one directly from the field picker.
Select + Add custom field, enter the field details, and select Save.
The new custom field is automatically selected and added to your template when supported.
You can continue building without leaving template setup or starting over.
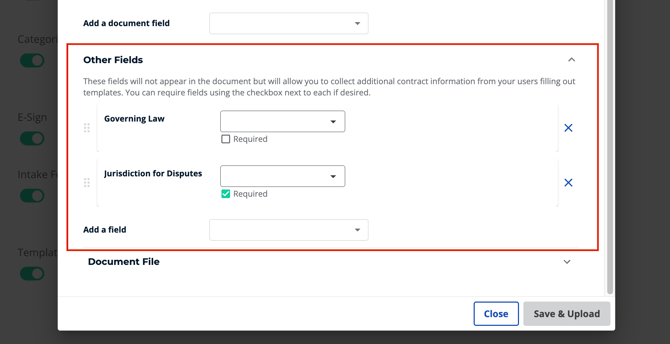
You can also choose to include Other Fields. These fields do not appear in the contract, but they allow you to collect additional information from the person completing the template.
Use the Required checkbox next to a field to make it required.When adding an Other Field, you can also select + Add custom field to create a new field without leaving the template setup workflow.
Adding Hidden Fields (Optional)
Hidden fields allow you to add information to the contract without showing those fields to the person creating the contract.While adding or editing a template, select the HIDDEN FIELDS tab.
Add the fields you want to include and enter any data that should be prefilled through the template.If you need a new field, select + Add custom field from the field picker.
After you save the field, it will be automatically selected and added to the template when supported.
When you are finished, continue with the template setup.

Auto-route for approvals (Optional)
You can automatically route contracts created from this template to specific individuals or groups.
Start by going to Settings > AI and Workflow options > Manage Templates
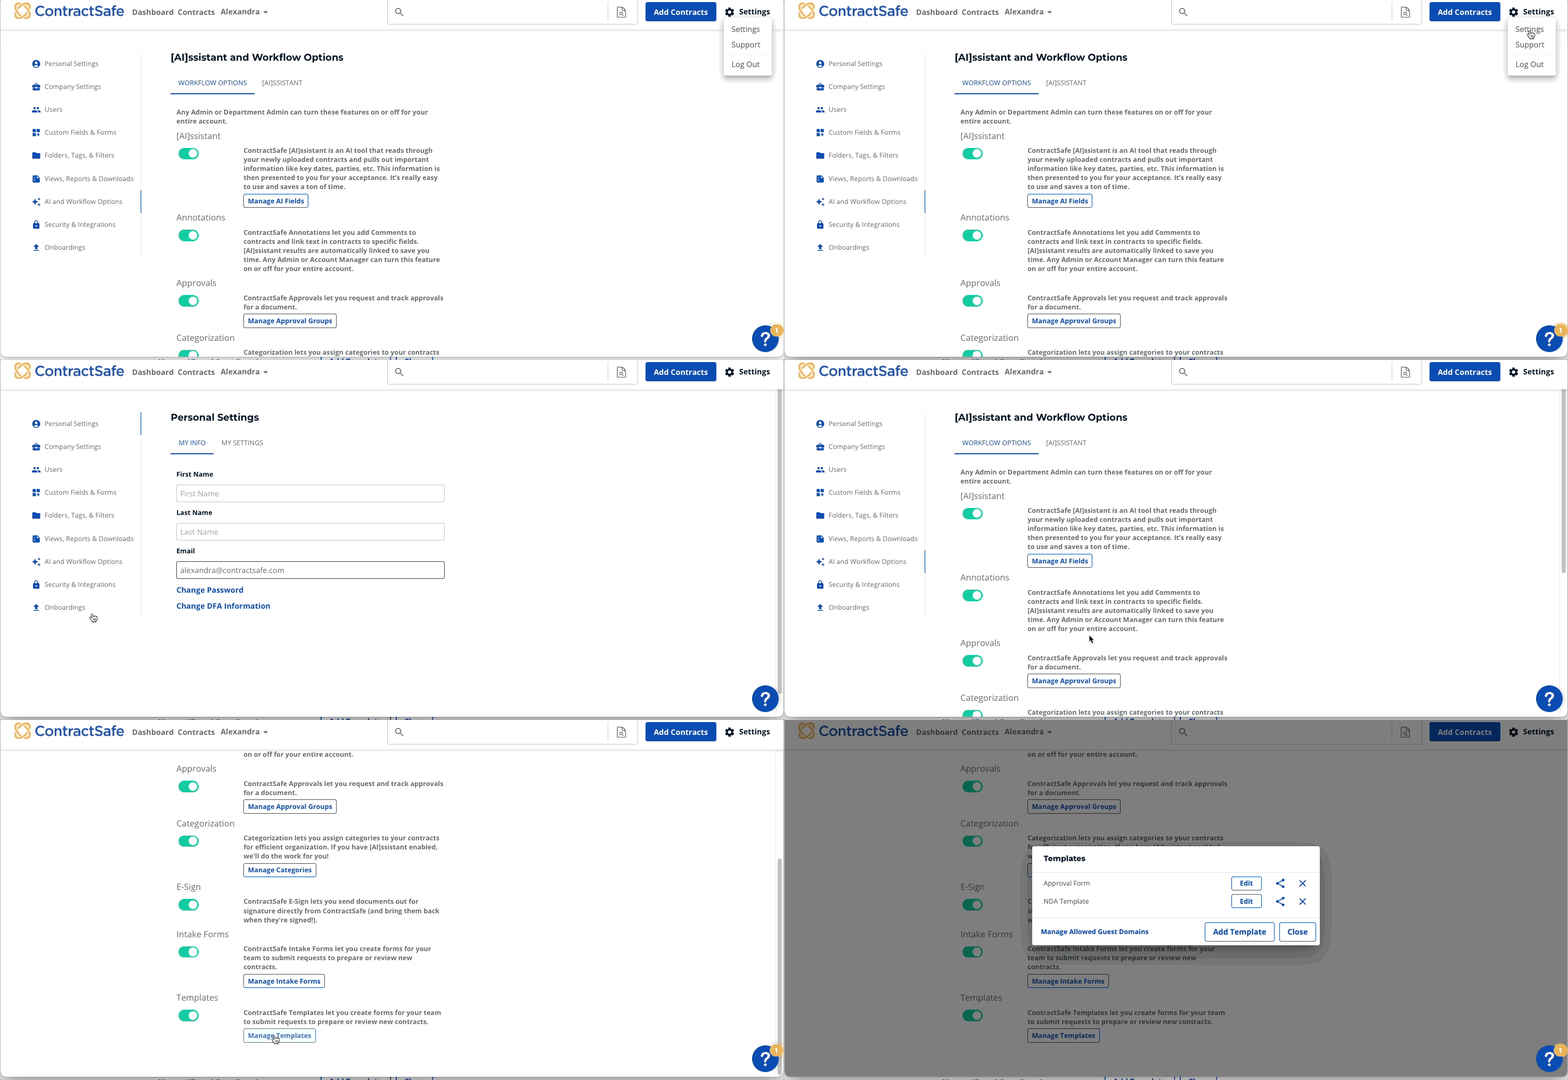
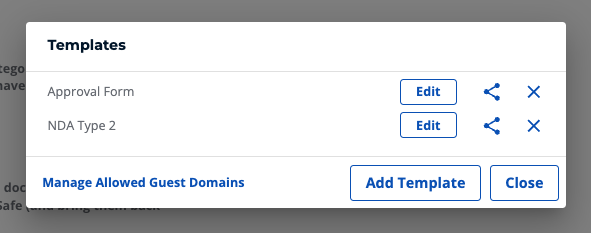
Choose the template you'd like to edit
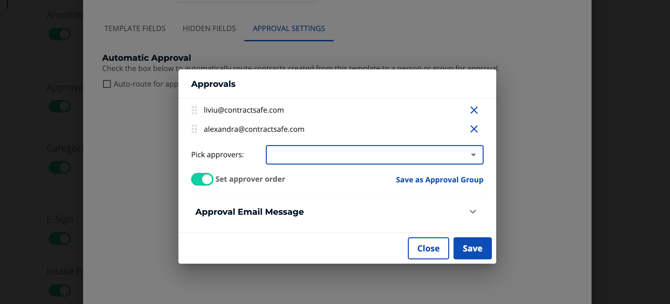
In the new window, select Approval Settings. Then select Auto-route for approvals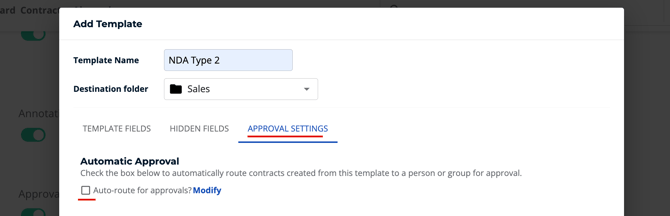
Choose your approvers and set the approver order if needed. Don’t forget to save!
Uploading a document
Go Back to the Template Fields Tab scroll to the bottom of it and be sure the document you upload is in .docx format and includes all the fields you want to capture.
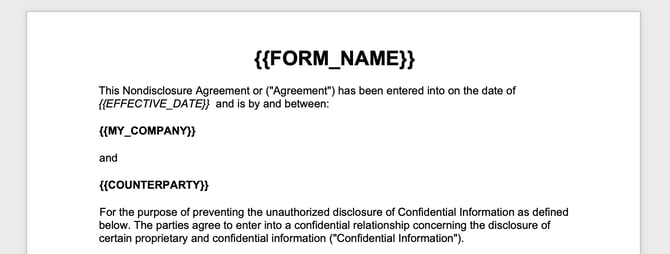
Note: The fields you want to capture must be the same in your .docx and ContractSafe settings. When you type in the fields in your document make sure you copy it exactly as it is including all brackets and CAPITAL letters.
Tip: You can format the variables using options like bold (B), italic (I), underline (U), etc. Apply the formatting to the entire field, including the squiggly brackets, to have it applied when the end user fills out the template.
When your document is ready, drag and drop it or search your computer.
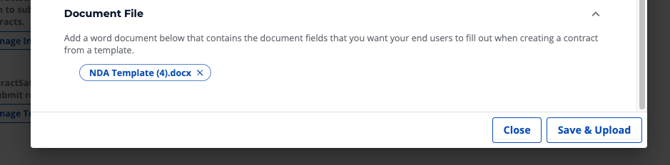
Then select Save & Upload
Creating a contract from a template
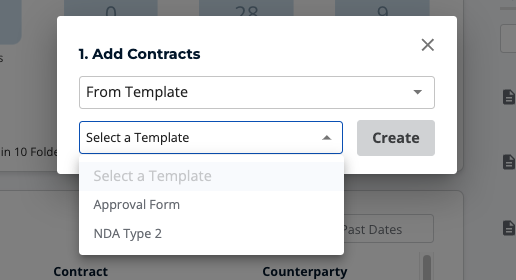
In ContractSafe, select Add Contracts
In the dropdown, select From Template
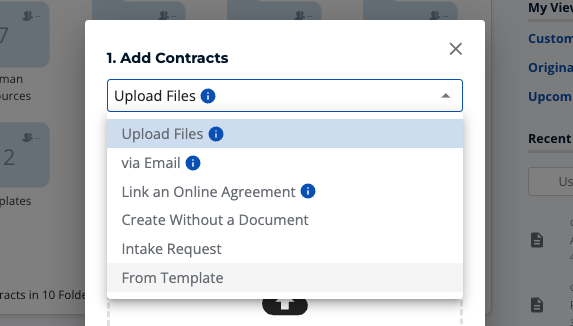
Choose your template then select Create
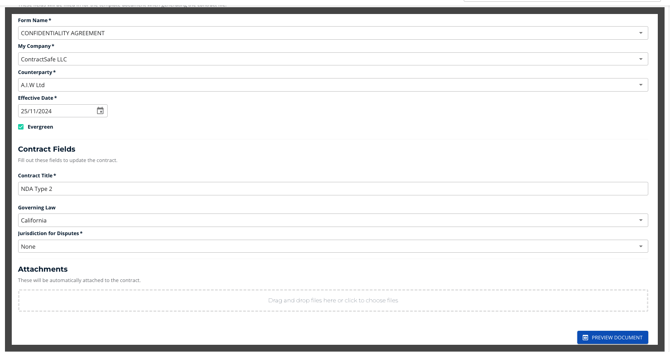
Fill out the necessary fields (in red) and add any additional attachments

Previewing the contract
Once you have entered all the necessary information and attached any files, select Preview.
Review the contract to ensure all fields and details are accurate. Then select Create Document
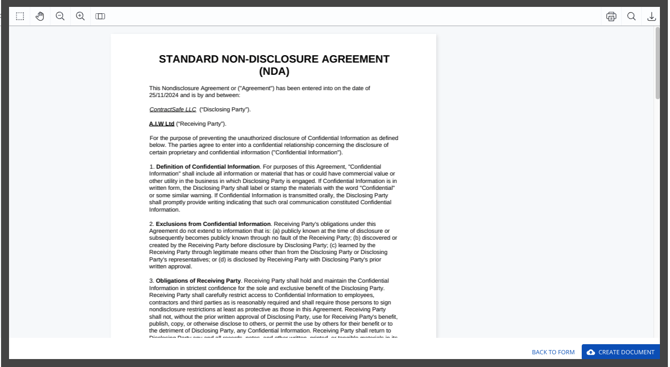
To view your newly created contract, go to the contracts list page where you’ll see it at the top

Please reach out to support@contractsafe.com for any questions.