This guide provides initial guidance for Admin users, roles that include these titles are:
Account Owner
Administrator
Department Admin
Stumbled here by mistake looking for a different Quick Start Guide? Check out the guides for Standard Users and Read Only Users.
Table of contents
- Video overview and introduction
- Set up your password and log into your ContractSafe account.
- Create and assign new folders.
- Create, share, and edit Saved Views.
- Set up, rename, and delete Tags.
- Create and edit Custom Fields on Forms.
- Upload a contract into your account.
- Find your newly uploaded contract.
- Invite initial users and assign their Roles and Permissions.
To get started, watch the 12 minute video below or scroll down to the instructions. The video offers an overview of what to expect.
You can get more help by selecting Support under the Settings icon at the top of every ContractSafe page or feel free to contact us directly via chat on the site or by email.
Ok … now that’s out of the way … let’s go!
ContractSafe is designed to let users like you:
- Find what you are looking for quickly, even within scanned documents.
- Make sure you are reminded of key contract dates.
- Create reports with the information you need.
- Collaborate with co-workers.
As an Admin user, you get special access to features that other permission levels don’t have access to such as:
- Invite new users and resend user invites.
- Create and assign new Folders.
- Create and share Saved Views with users.
- Set up and rename Tags.
- Change the Email In password that’s used to email contract uploads.
- Create and edit Custom Fields on Forms.
- Assign user Permissions and Roles.
1) Set up your password and log into your ContractSafe account.
You were sent an email invitation from us to create a user account. Click on the link in the email to set your password. For security reasons, invitation emails expire after 24 hours. If your invitation expired or you did not get it, email Support to have the invite be re-sent.
This is what the email invitation looks like. It will be coming from New-User@contractsafe.com: 
If you need to invite a new user or members of your team need their invites resent, here’s what to do.
How to Invite New Users
- Go to Settings.
- Click on Users.
- Click on the blue Add Users button
- Enter the user’s email address in the email bar.
- Select the role for the user/s
- Select Send Invitation
The user will receive the same email as the above screenshot noting that you invited them to join ContractSafe.
How to Resend User Invites
- Select Settings.
- Click on Users.
- Find the User whose invite you’d like to resend and scroll over it.
- From the Invite column, select resend.
- A pop up will appear in the lower left corner noting: User invitation has been resent.
- Click Done.
The user will receive an email noting that you invited them to join ContractSafe, just like they did when they were first invited. The screenshot below illustrates where the resend invite button is located:
Tip: Resending a user invite for existing users will reset their dual factor authentication settings, and will allow them to set it up again.
2) Create and assign new folders.
Create New Folders
You can assign each contract to a Folder to keep them organized, see information, and create reports by Folder. You can also set each user's permissions to limit their access by Folders.
You can even set up Folders to match the specific needs of your organization. Some organizations select their Folders based on their departments (i.e., Finance, Operations, Sales, Marketing, Legal, Human Resources etc.) and others do this by the kind of agreement (i.e., Sales Agreements, Vendor Agreements, Employee Agreements, etc.). It’s best to pick one approach and start with a basic list of Folders. It’s easy to make adjustments and add more Folders as you become more familiar with the site and add more contracts.
There are two ways to create new Folders.
Option 1
- From the Dashboard, select Manage Folders. If Folders are not already selected on the drop down menu next to Small - Large, select it.

- Type in a name for the new Folder and select +Add then Done.
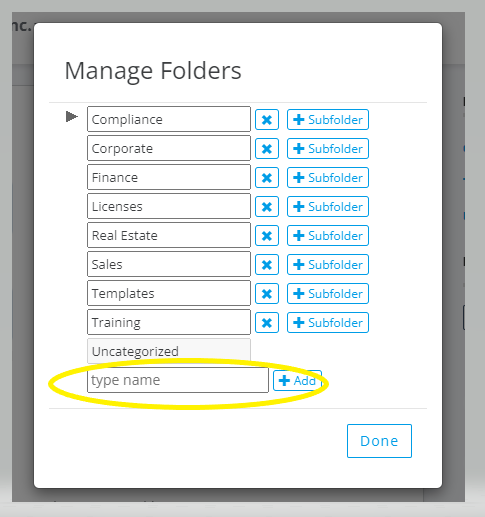
You can also change existing names and delete Folders from this menu:
- Change a name: Type in the new Name into an existing Folder field and then select Done.
- Delete Folders: Click the X box next to the Folder Name, select Yes, then select Done.
Option 2
- Select Settings.
- Click on Folders & Tags.
- Make sure the circle titled Folders is marked.
- Scroll down to the blank field and type in your new Folder name.
- Select +Add.
- Click Done.
Changing existing Names and deleting Folders also works the same way with this option, the task is just being accessed from a different location.
Your new Folder will now appear on the Dashboard page.
Assign New Folders
To assign your contracts a new Folder, you now need to click into a Folder to identify a contract - this can be done from the Contract List Page that looks like this:
If you know the name of your contract you can instead type a few words from it directly into the Search box that’s located in the upper right corner and then press Return or Enter on your keyboard to generate a search.
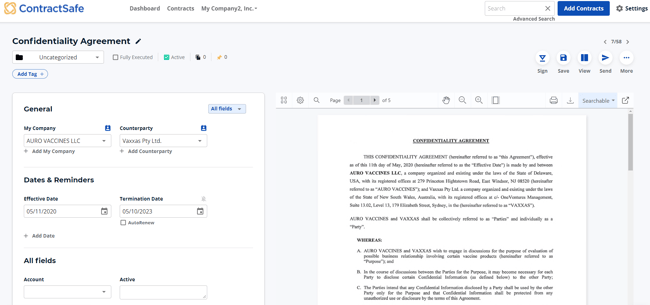
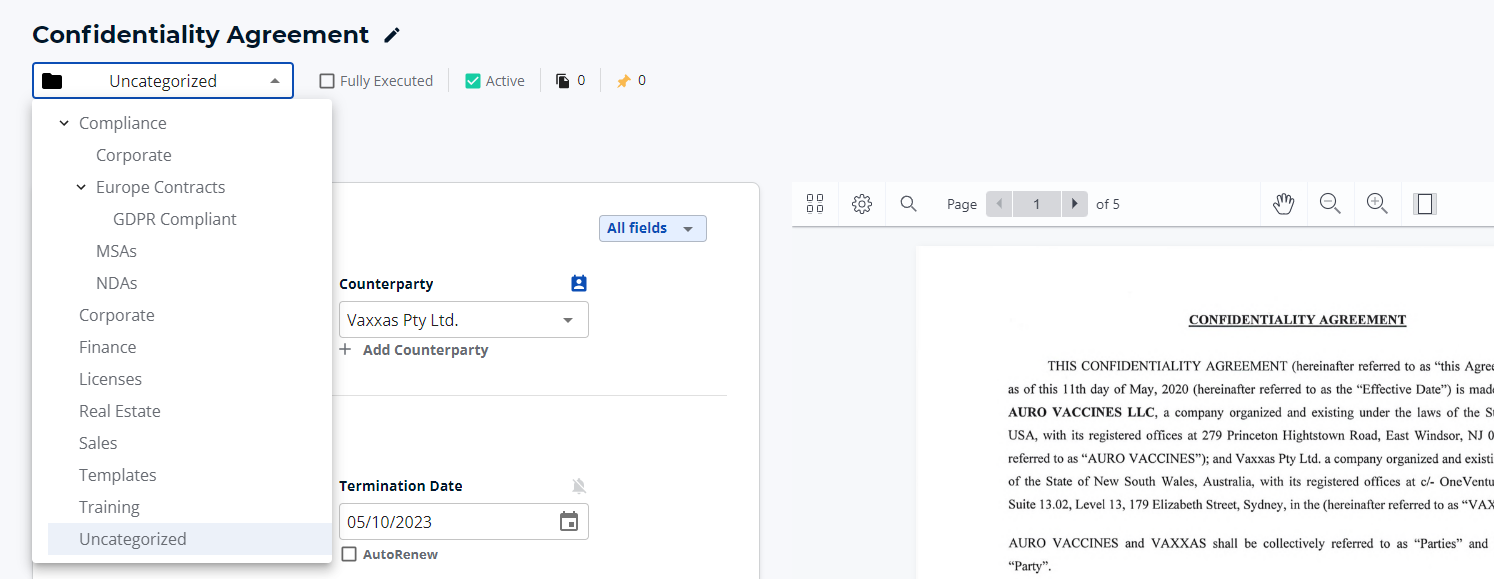
Once you are on a contract, select the Folder you’d like by clicking on the black Folder icon under Contract Name to pull up the drop down menu. The system will automatically save this setting and a notification will appear in the lower left corner noting “Record saved.”
For all accounts, you also have the option to enable and use Subfolders. You can use Subfolders for filtering, reporting, or even permissions. See: How to Enable and Use Subfolders.
3) Create, share, and edit Saved Views.
Create Saved Views
There is the option to create Saved Views to show more or less columns on the Contract List Page. This option is available at the Standard Subscription level and above.
Saved Views let you edit your Contract List to see any of your contract information at a glance. What if you want to see different information for different kinds of contracts? For example, you might want to see confidentiality-related information for your NDAs, but payment information for vendor contracts. With our Saved Views feature, you can create different ways of looking at contracts, each with just the information that you want to see. Since you are an Admin, you can even share Views with others.
Your account comes with two standard views:
Original. This view is automatically set as your Preferred view, so it will be the default version of your Contract List unless you choose to change it.
Upcoming. Shows a list of all your upcoming contract dates.
You can toggle between these two views by going to the top right corner of the Contract List Page and clicking on the button next to the Actions button.

Now, let's say that you'd like to create and save additional Views? Here's how:
- Select Actions.
- Choose Edit columns.
- Check off the columns you’d like to add to your new View.
- Drag and drop the columns that will now be on the right to organize the order you’d like your categories to show up.
- Click Apply.
- Select Action again.
- Choose Save as New View.
- Type in the name for the view.
- Select Private View or Standard View.
- Select Save View.
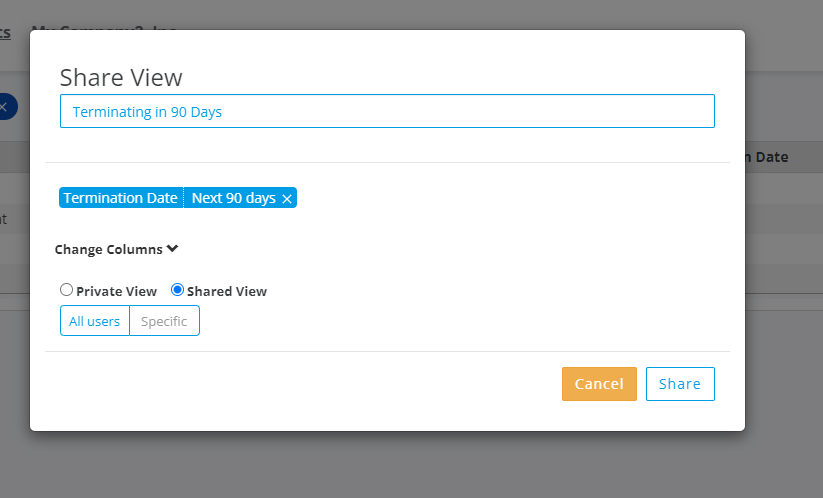
Share Saved Views
To share a Saved View with any or all of the users on your ContractSafe account, just start by selecting Share View from the Actions menu and then pick the user(s) who you want to share it with. Or you can keep it as a Private View.

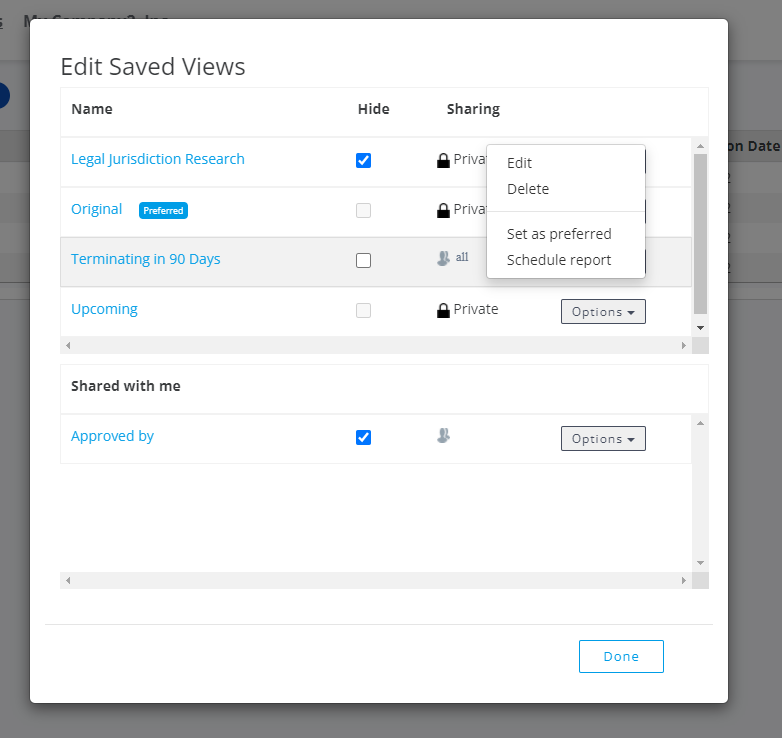
Edit Saved Views
If you want to make the new view the default display of the Contract List every time you log into your contract management system account, just go to Actions in the top right corner of the page, click on Edit Saved Views and then Options. That's where you can select a Saved View as your Preferred Saved View. Save the change by clicking on Done.
4) Set up, rename, and delete Tags.
You can use Tags as another way to segment and organize your contracts. Create any number of Tags and apply any number of Tags to each contract, if you’d like. This enables you to assign Tags and track contracts by region, territory, facility, project, etc. You can also set each user’s Permissions to grant them access to contracts by Tags (in addition to Folders).
This is also how you can use your ContractSafe account as a virtual data room for diligence and audits! Just create a Tag for the diligence/audit project, Tag the contracts that are relevant, and add the third parties as Read-Only Users with their Permissions limited to this single Tag.
Set Up Tags
Tags can be set up from Dashboard. When in Dashboard, click over from Folders to Tags if it’s not already selected, via the drop down menu, then select Manage Tags, per the circled sections:
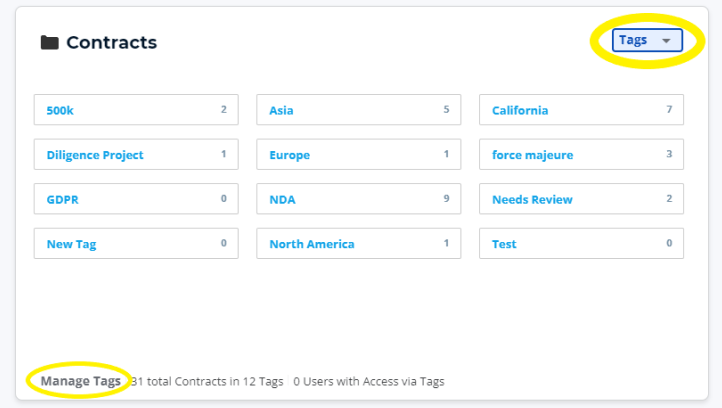
And start adding your Tags.
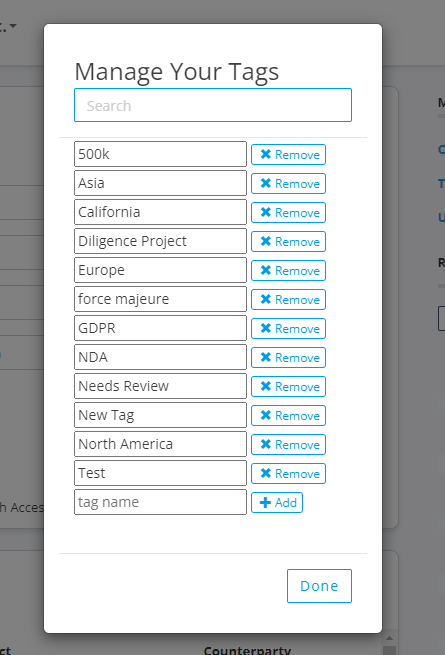
Rename Tags
This is the place where you’ll also be able to rename and delete Tags; it follows the same process as renaming and deleting Folders that was noted above.
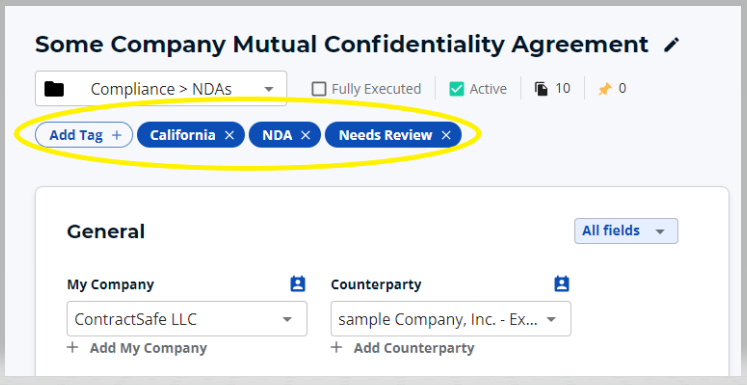
Delete Tags
Tags can also be added and deleted (not renamed) from the Contract Page:
5) Create and edit Custom Fields on Forms.
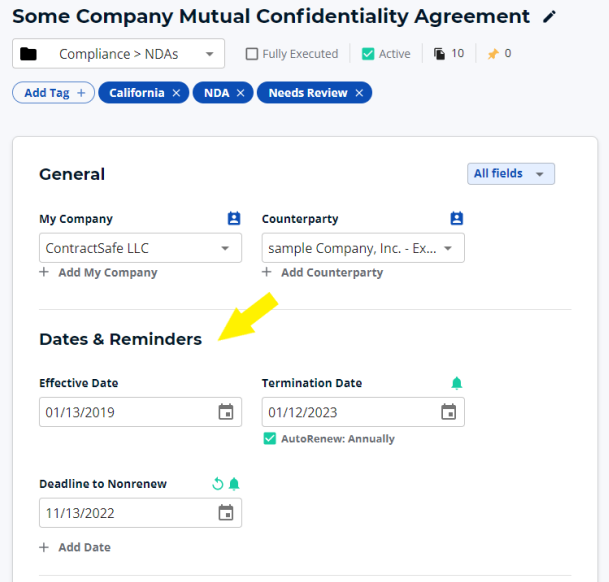
Mix and match Standard Fields and Custom Fields to present them all together in one place. Before you get started with creating a new Form or editing a Form, keep in mind that in the Dates & Reminders section, every contract has three date sections within Forms:
- Contract-Specific Dates. Intended to be one-off dates that you could add to any specific contract without having to add them to a Form.
- Effective/Termination Dates. Two of our standard date fields. They're available to populate on every contract. They indicate the period of time a contract is effective.
- Custom Date Fields. Part of Custom Field Forms (formerly called Templates) that can be brought into any contract. They're reusable in comparison to Contract-Specific dates, which aren't part of any form.
This information will come in handy when you set date fields on Forms.
How to Create a New Form
- Select a contract from the Contract Page.
- Click on the Forms list dropdown located on the Form.
- Choose Edit Form from the drop down menu.
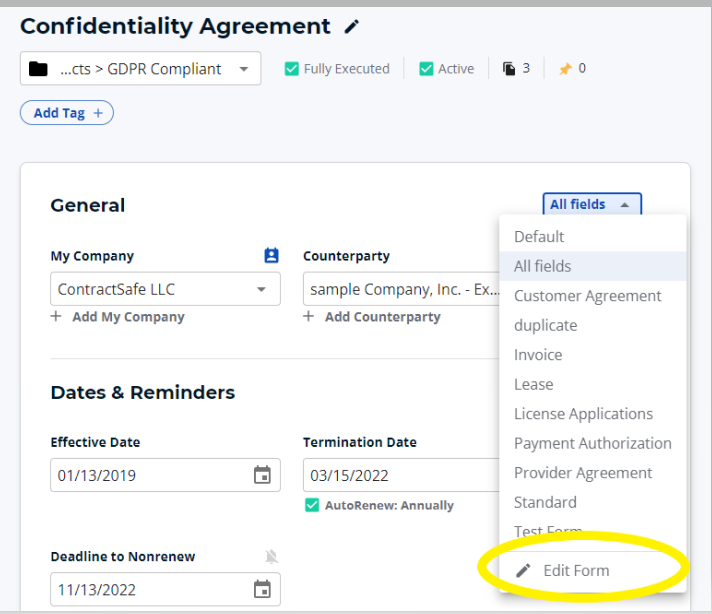
- There will be a box that pops up that says Edit Form, All fields.
- Select All fields.
- Scroll down to + Add Form.
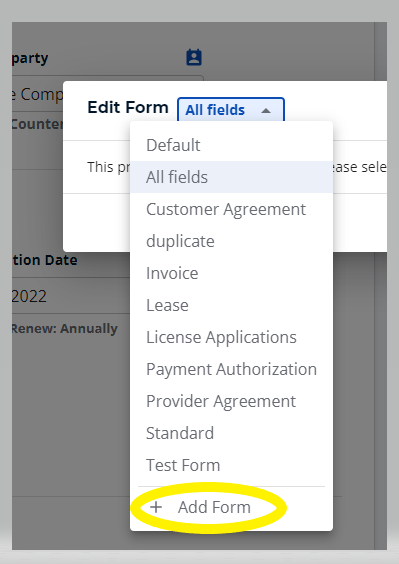
- Name your Form.
- Click Add.
- Customize your Form accordingly.
- Select Save.
How to Create a Custom Field
If we don’t have a Standard Field to track the information you want and you want more control than Tags or Folders offer, you can create Custom Fields. They can be just about any format: text, number, check box, currency, drop-down, multiple choice or date. You can also group Custom Fields together that apply to specific kinds of agreements.
For example, you may have a group of Custom Fields you want applied to customer agreements and a different set of Custom Fields you want applied to vendor agreements.
And once you start using Custom Fields, you can use this information to search, filter, report and display the information on your Dashboard.
Let’s get started.
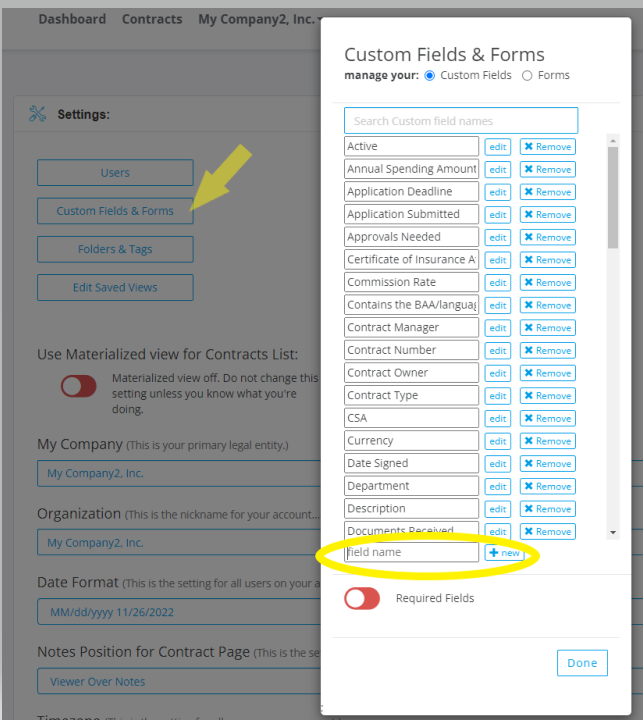
- Select Settings.
- Click on Custom Fields and Forms.
- Make sure the circle on the line “manage your” has the Custom Fields boxed marked.
- In the blank Field line, type on the name of your choosing.
- Select +new.
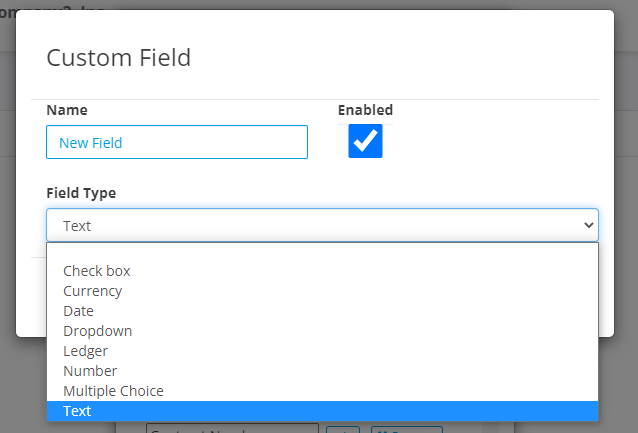
- A Custom Field box will pop up. Check the enable box to enable the Field (if it’s not already checked).
- Choose a Field type from the drop down menu.
- Select Save.
- Choose Done.
How to Add a Custom Field to a Form
Now that you’ve just created a new Custom Field, it’s time to add it to a form. Here’s how.
- Select Settings.
- Click on Custom Fields and Forms.
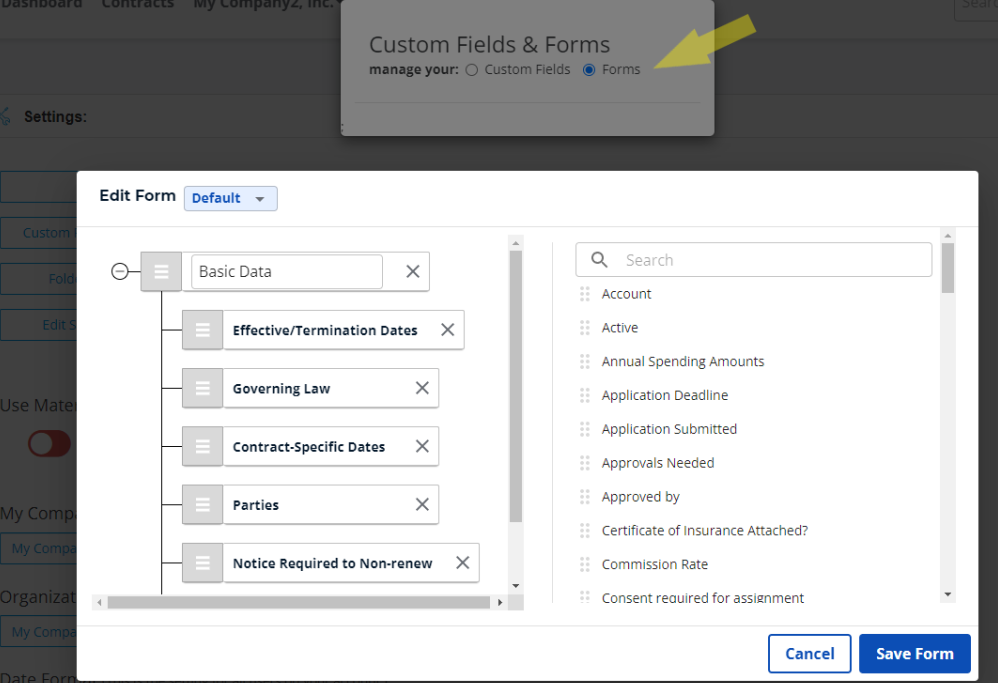
- Make sure the circle on the line “manage your” has the Forms boxed marked.
- On the right side, scroll down to find your Custom Field or type the name of it into the search box.
- Drag it over to the left, onto the Form where you’d like it to appear.
- Select Save Form.
- Choose Done.
- Choose a contract and visit the Contract Page to view it.
How to Edit Custom Fields That Are Included on Forms
- Select a contract from the Contract Page.
- Choose Edit Form from the drop down menu.
- From the top of the pop up box, choose the Form you’d like to edit.
- Drag and drop different sections to manage your Forms. You can even change the Labels of the sections!
- To delete sections, click each “x.”
- To add Custom Forms or Standard Forms, just select the Form you'd like from the drop down menu. The Fields that have not already been added to the Forms will show up. Drag and drop any Field you’d like over to the left where you want it.
- Select Save.
- Go back to the Contract Page to view your new sections. If your Form does not automatically show up, select it from the drop down menu in the General section.

6) Upload a contract into your account.
There are three ways to upload contracts into ContractSafe.
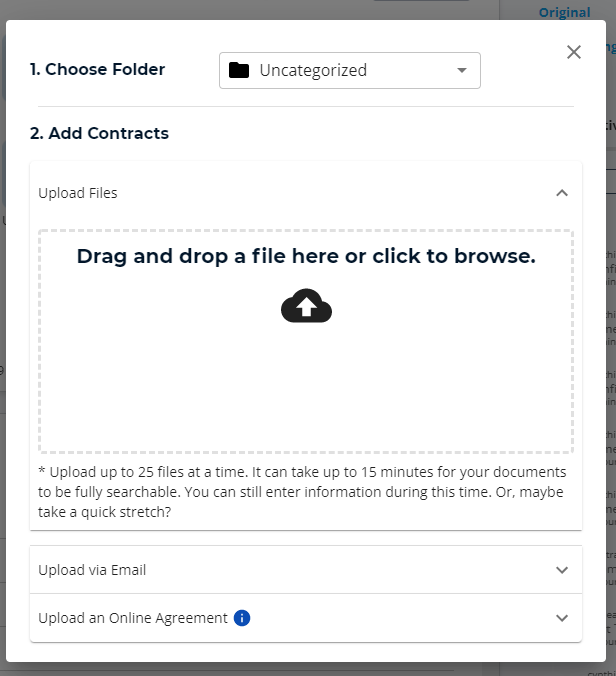
- Login and select Add Contracts at the top of any page in ContractSafe and then select Choose a Folder to select a folder from the menu. Next, choose the contract you want from your computer or drop it into the box where indicated.
- Email contracts directly into your account (our favorite). Your account’s email address is shown when you select Upload via Email. You can also find your “Email In” Address in your Email Settings. Any email attachments sent to this address will automatically be uploaded into your account. Add Folder= at the end of your email subject line to have ContractSafe automatically assign the folder.
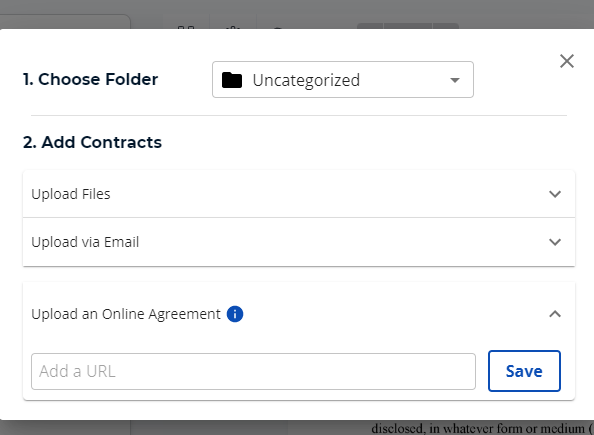
You can also upload online agreements! Just copy and paste the URL and hit Save.
As a new user, to make things a little easier, you’ll want to consider
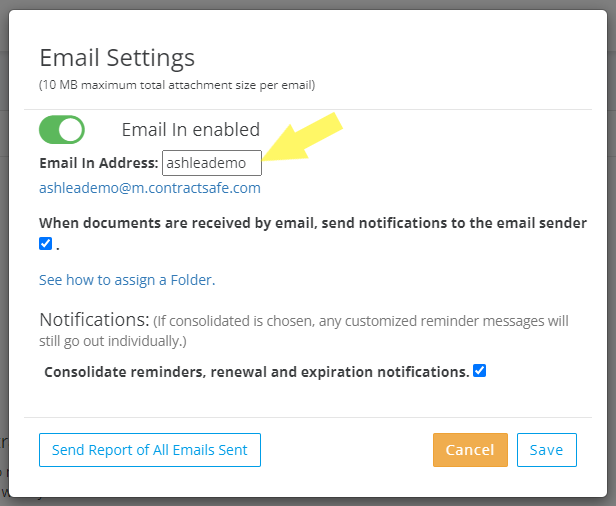
configuring your email address for emailing documents into your account. You can configure the Email In address in Settings >> Email Settings to make it something specific for your organization.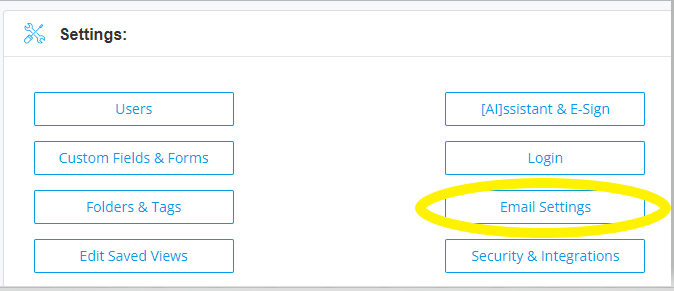
Once the dialog box opens, make sure Email In is enabled and then just fill in the box with the email prefix you want for your company.
- The third way to upload a contract is by visiting the Dashboard and making sure you have the Folders section open (instead of Tags or Counterparties). Locate the contract you’d like to open on your computer. Drag and drop it right into a folder.
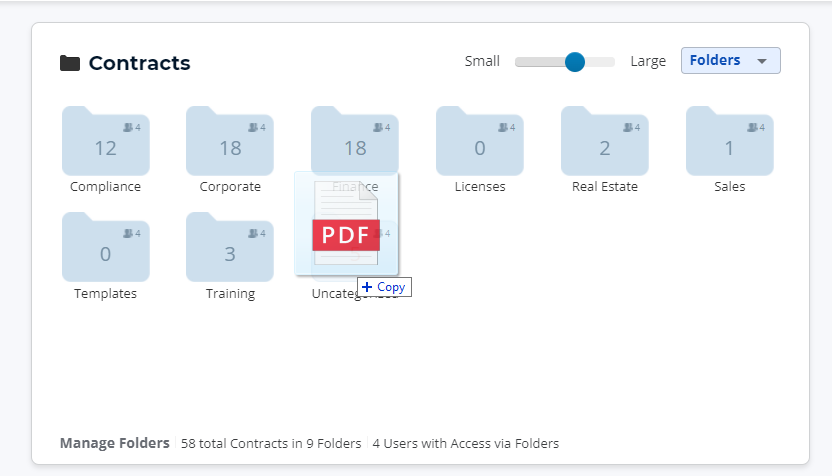
[Pro tip: If you have a scanner that can send out emails, you can add your ContractSafe email address to the scanner and then scan and send contracts directly into your ContractSafe account!]
Bulk Uploading
As part of your onboarding service, we offer a Bulk Upload Service (there’s no extra fee for this. Bulk Upload is included). Just organize your contracts with key data in a spreadsheet and we can upload your contracts and data into your account. If you don’t have organized data, we can take care of everything with our Jump Start Service (for a small extra fee). We’ll take all your files, get them organized, extract the key data, have it validated by paralegals, upload this data and the contracts into your account, and set your email reminders for key dates. This is a turnkey way to get all your contracts organized!
No matter how your contracts are uploaded, you’ll get email reminders in advance of the contract termination so you’ll never be surprised by a contract ending, or renewing! And you’ll have this information available to you and your colleagues for quick reference whenever and wherever it is needed.
7) Find your newly uploaded contract.
After logging in, select Contracts from the top of the page. This is where all your contracts are listed. Newly uploaded contracts will appear here at the top and will be highlighted. Select a contract (by clicking on it) for more detailed information.
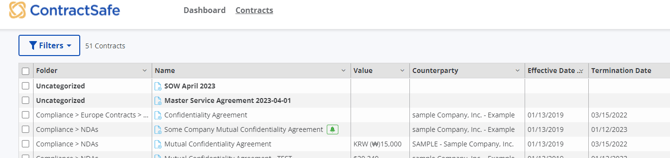
Pro tip: You can use the search bar at the top right of any page to find any contract with a quick, Google-like keyword search.
8) Invite initial users and assign their Roles and Permissions.
Every ContractSafe account includes the ability to invite an unlimited number of additional Users and manage their Role and Permissions so they can only see and change the contract information that you want.
You can add Users and manage their Roles and Permissions in Settings.
To add a new User, simply enter their email address and select +invite User. You can then select their Role and Permissions.
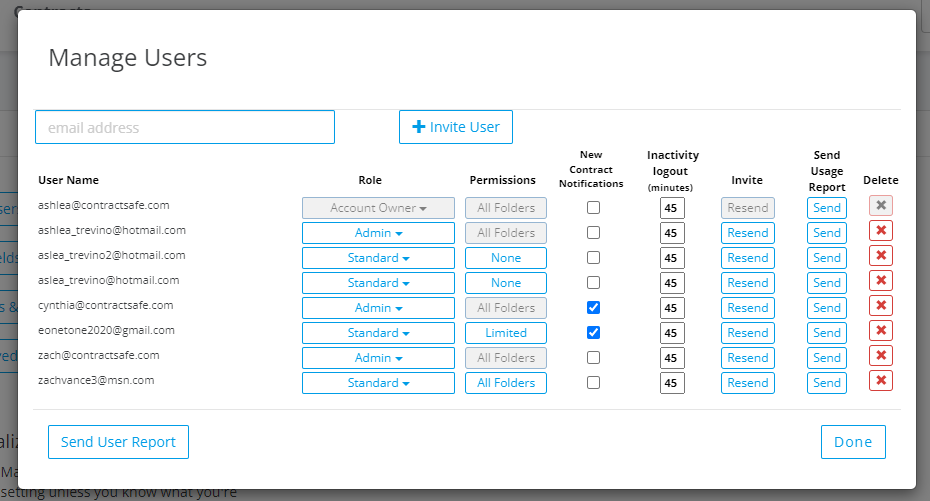
Roles cover what a user can do in the system (Read-Only, Download OK, Read-Only, No Download, etc.).
Permissions grant or restrict access by either Folders or Tags. This is how you control what users see (or don’t see!) in ContractSafe.
New users will not have access to any contracts until you give them a Role and set their Permissions.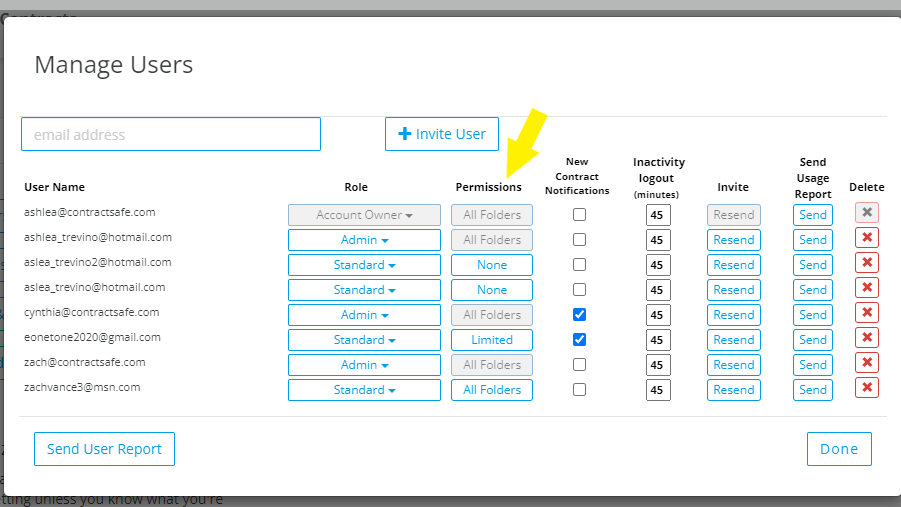
And that’s it! Those are the basics of how to get started with your new contract management software.
Please reach out to support@contractsafe.com for any questions.